Pre-requisites
- Omeda account
- Newsletter Glue plugin and license
- WordPress site with Newsletter Glue plugin already installed
Integrate during Newsletter Glue onboarding
Go through onboarding to get your API key
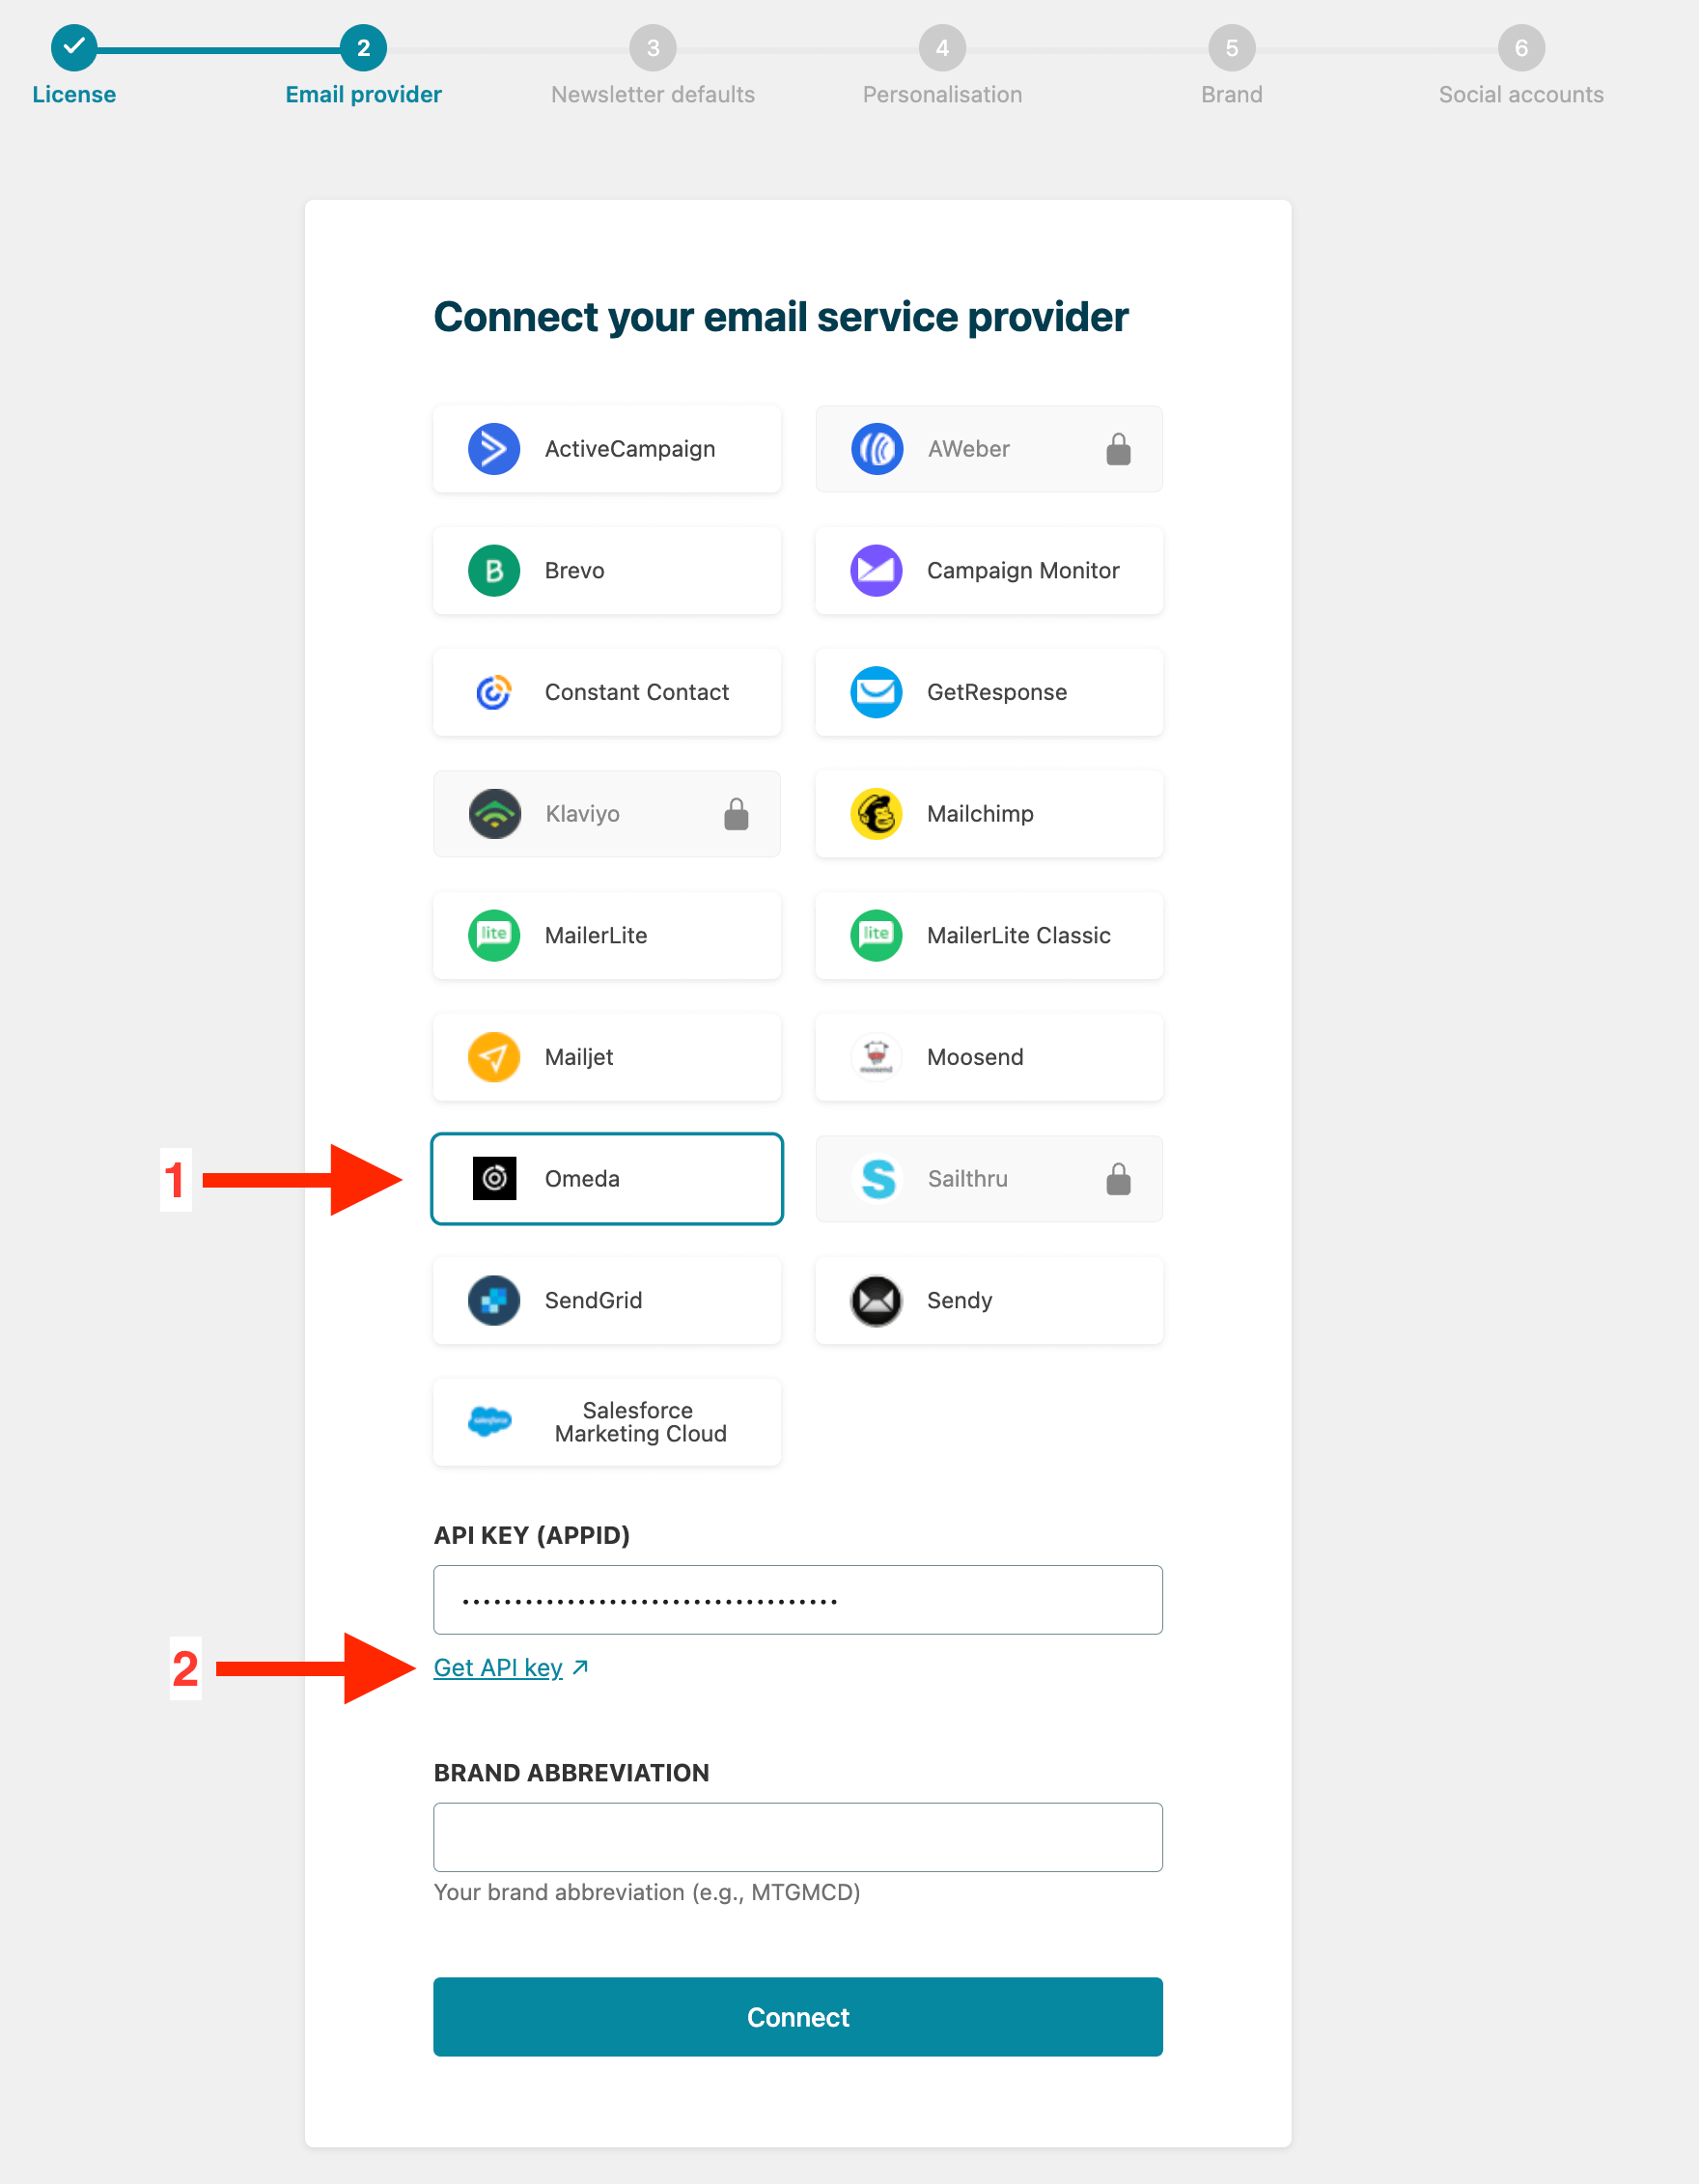
After activating the Newsletter Glue plugin, you’ll be taken to our onboarding wizard. Enter your license key to activate your license. Then, connect your email service provider.
1. Select Omeda from the Email service provider options.
2. Click on Get API key.
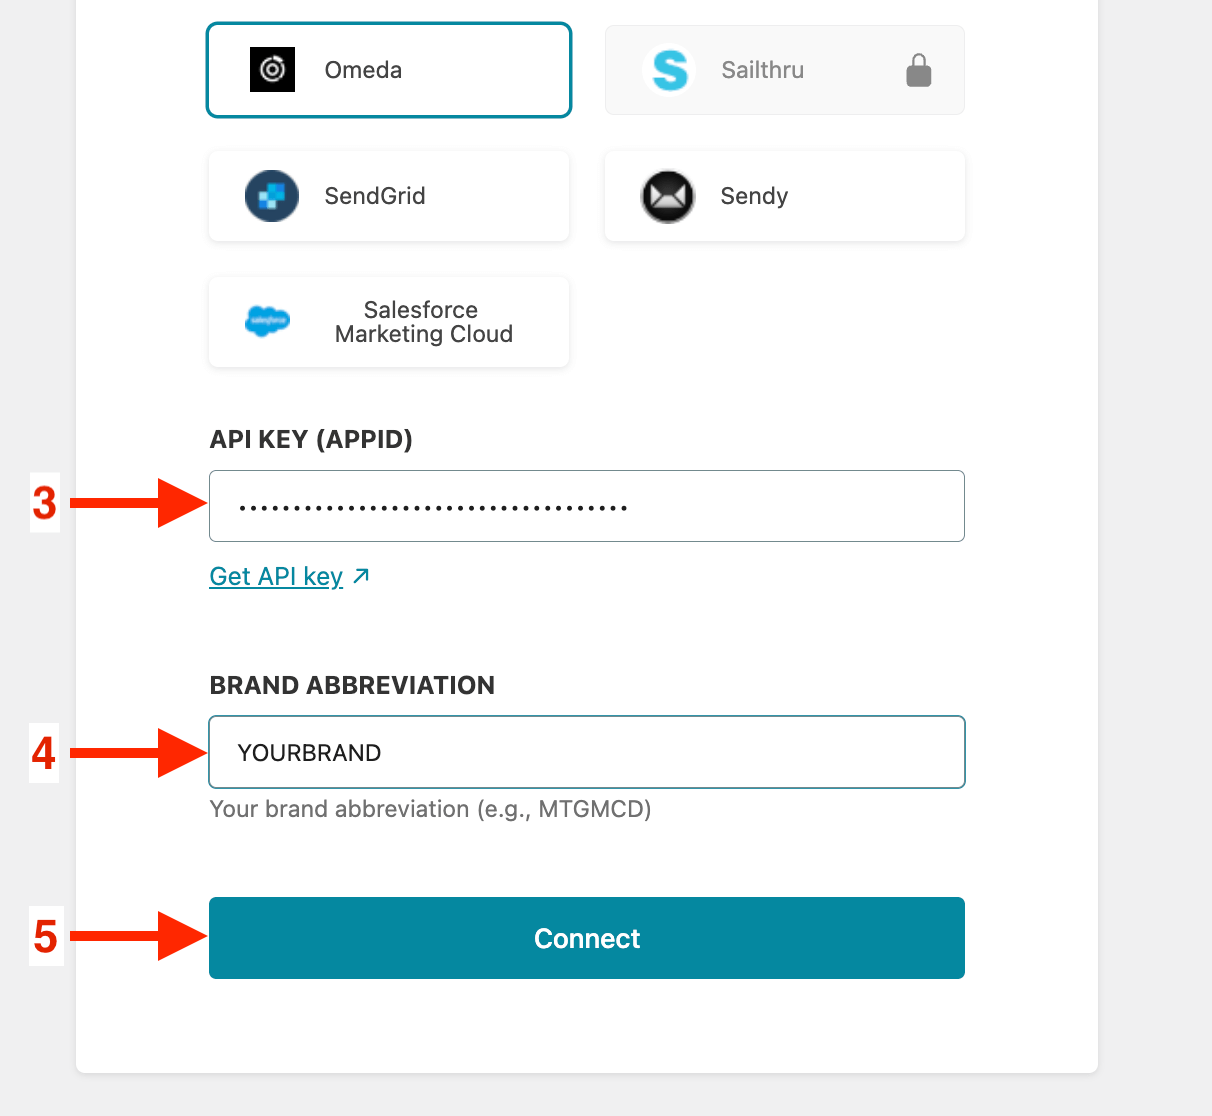
3. Enter your Omeda API key.
4. Enter your Omeda Brand Abbreviation.
5. Click on Connect.
6. Done! You’ll be able to select your email defaults and customize your newsletter and complete the onboarding wizard.
Integrate from Settings -> Connections
Step 1: Login to your WordPress admin and head to Newsletter Glue settings
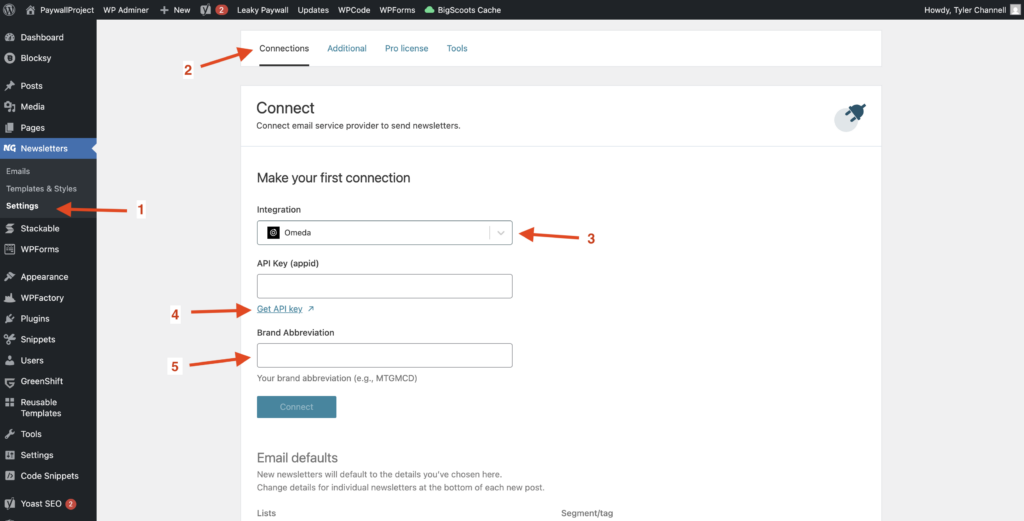
1. Login to your WordPress admin and head to Newsletters > Settings > Connections
2. Then, select Omeda from the Integration dropdown options
3. And click on Get API key underneath the Omeda API key field
Step 2: Enter your API key and connect
4. Enter your Omeda API key.
5. Enter your Omeda Brand Abbreviation.
6. Click Connect
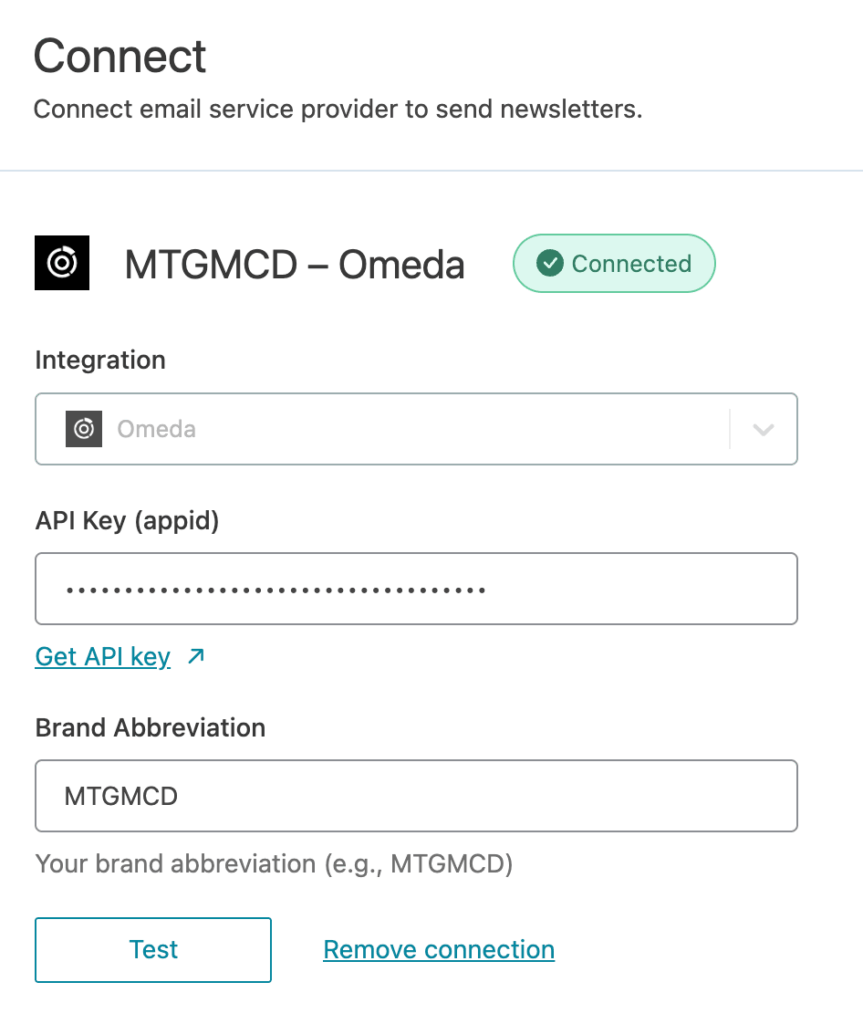
7. Success! You’ll see Connected status next to Omeda.
Email Sending Rules
- Omeda requires all newsletter campaigns to be manually approved in their dashboard.