Pre-requisites
- Create an account at app.sparkpost.com/join
- Select the region, either SparkPost or SparkPost EU.
- After you successfully create an account, add a domain and verify it. (https://app.sparkpost.com/domains/list/sending)
- Newsletter Glue plugin and license
- WordPress site with Newsletter Glue plugin already installed
Integrate during Newsletter Glue onboarding
Go through onboarding to get your API key
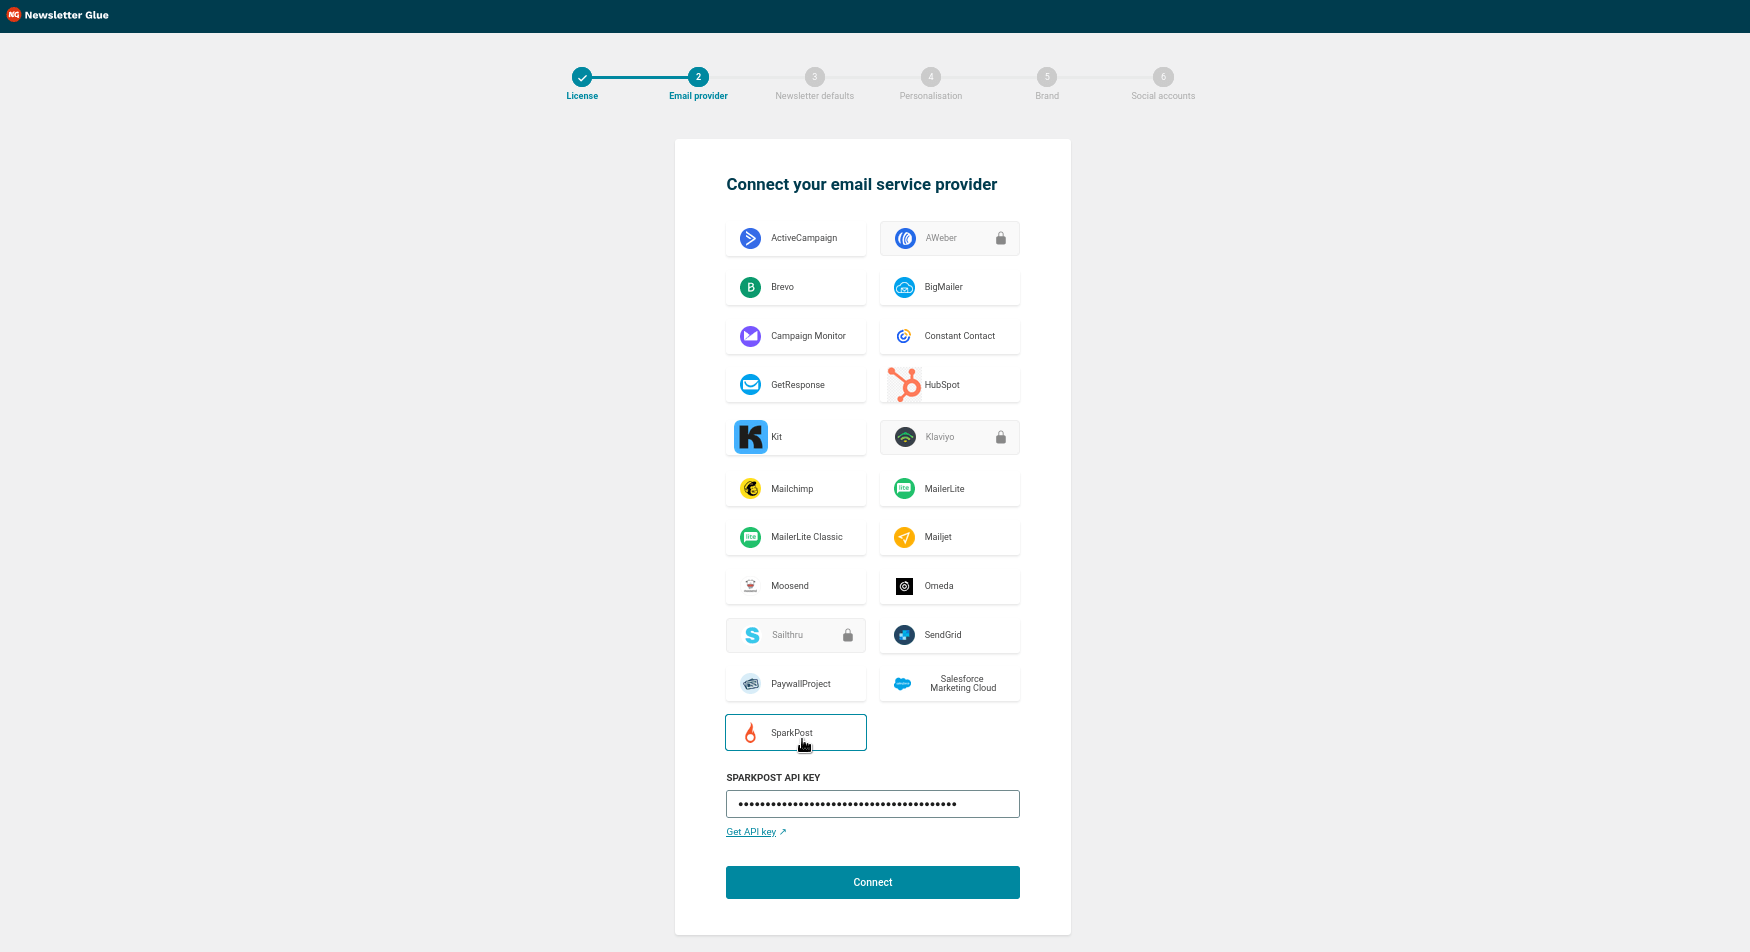
After activating the Newsletter Glue plugin, you’ll be taken to our onboarding wizard. Enter your license key to activate your license. Then, connect your email service provider.
- Select SparkPost from the Email service provider options.
- Paste your API key and click Connect.
3. Done! You’ll be able to select your email defaults and customize your newsletter and complete the onboarding wizard.
Integrate from Settings -> Connections
Step 1: Login to your WordPress admin and head to Newsletter Glue settings
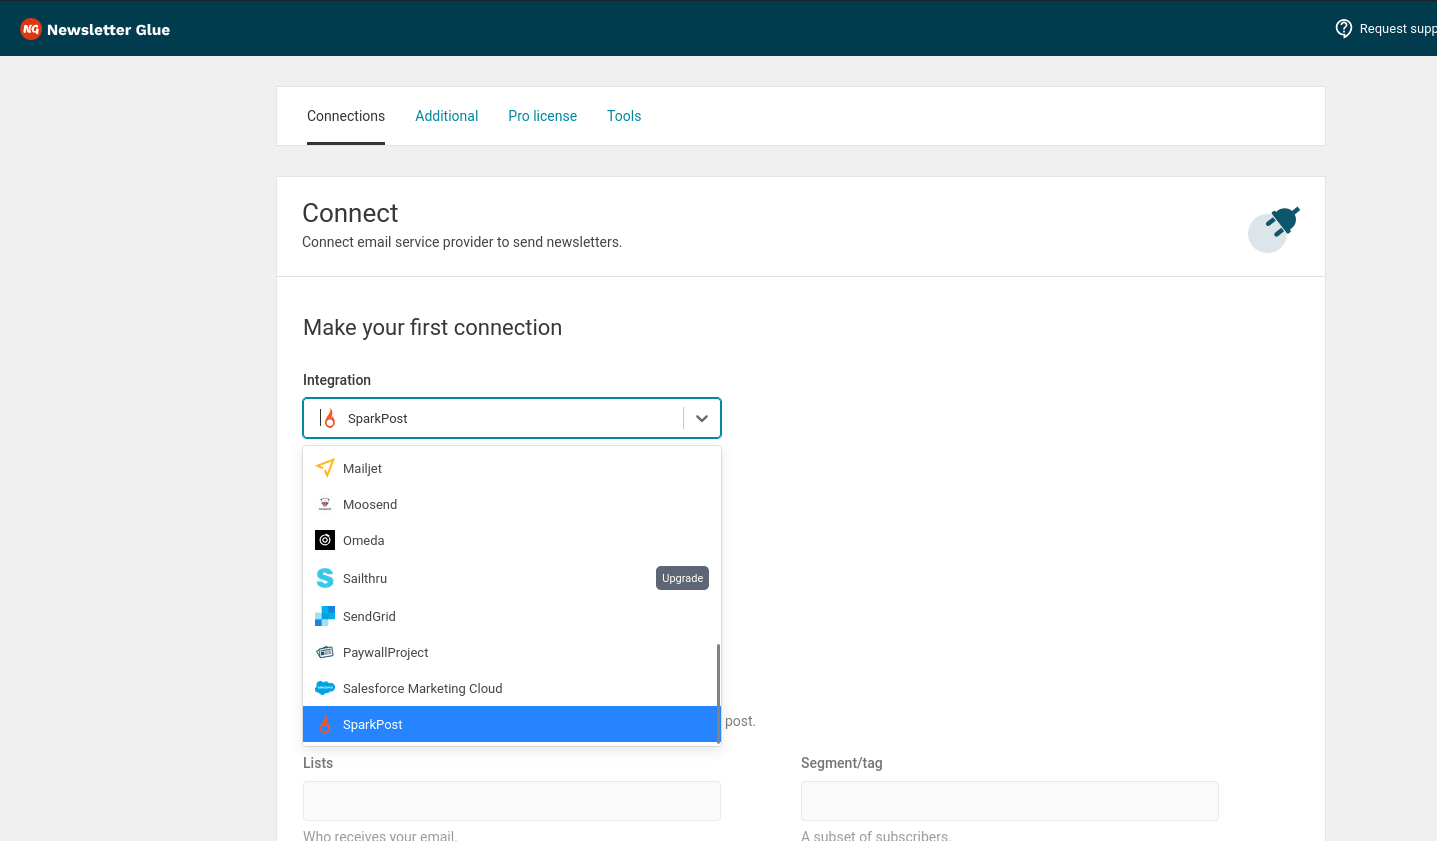
1. Login to your WordPress admin and head to Newsletters > Settings > Connections
2. Then, select SparkPost from the Integration dropdown options
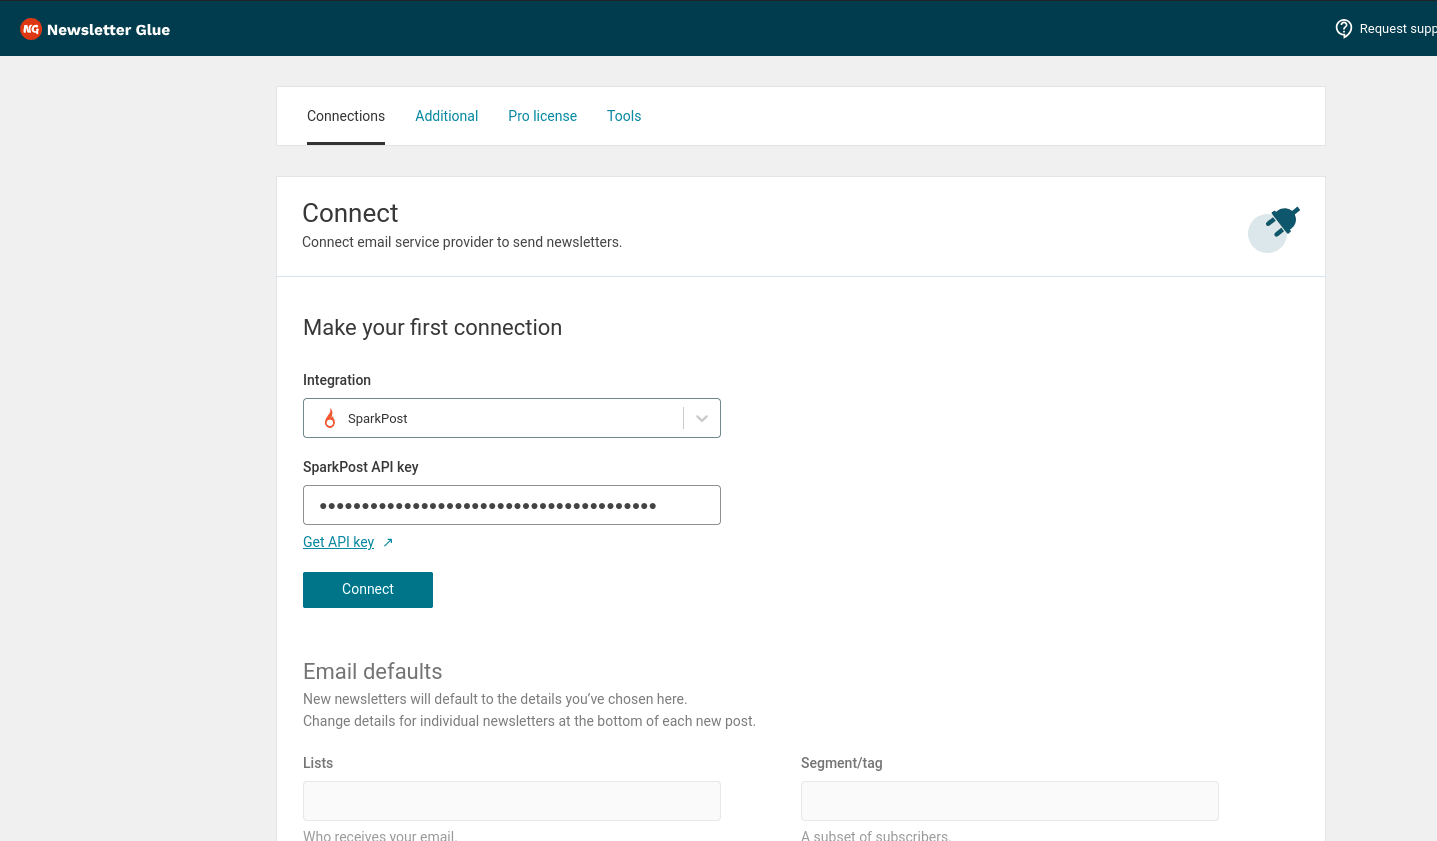
Step 2: Enter your API key and connect
3. Select Get API key.
4. Copy your API key from SparkPost.
5. Click Connect
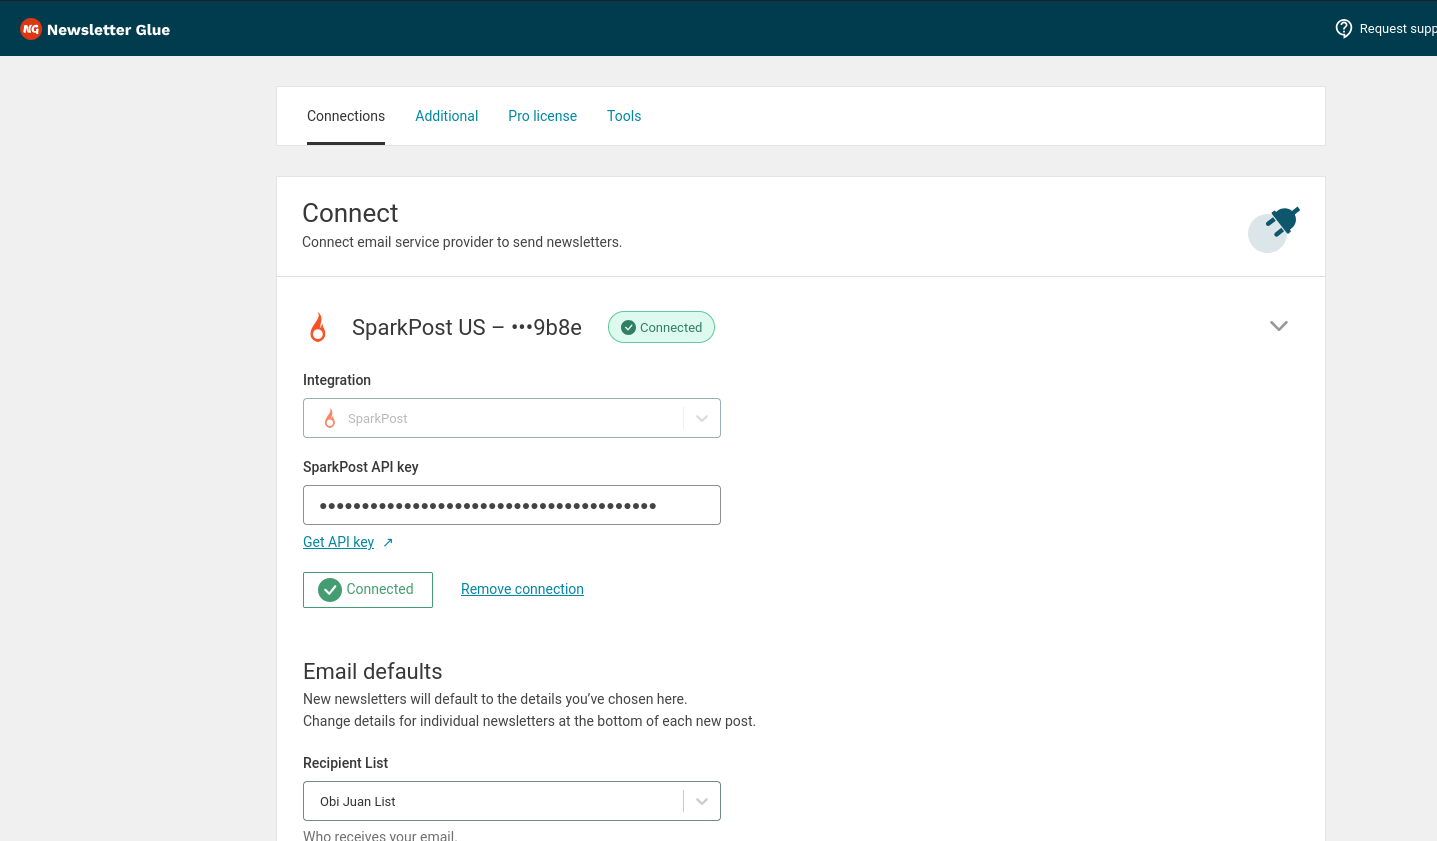
6. Success! You’ll see Connected status next to SparkPost.
Email Sending Rules
- Newsletter Glue automatically detects your SparkPost account region (US or EU).
- SparkPost does not support direct user subscriptions — you must upload Recipient Lists in CSV format instead.
- Manage your Recipient Lists at app.sparkpost.com/lists/recipient-lists. See the Recipient Lists API docs for full documentation.
- Once your Recipient List is uploaded, you’re ready to send.
- Sparkpost requires a valid email for sending.