
Pre-requisites
- Moosend account
- Newsletter Glue plugin and license
- WordPress site
Integrate during Newsletter Glue onboarding
Step 1: Get your API key details
- Go to Moosend Dashboard, click on Profile icon -> Settings
- On the Settings page, click API Key menu
- Copy the API Key
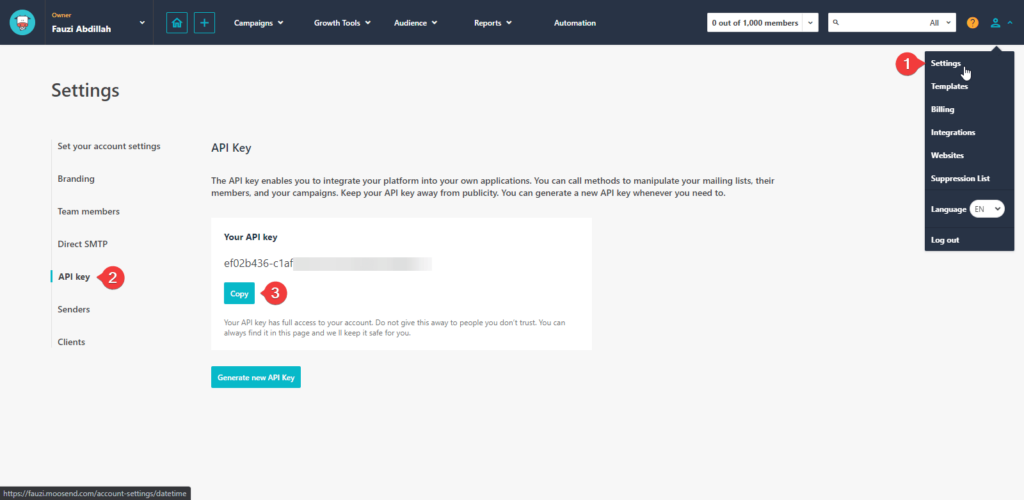
Step 2: Connect Moosend to Newsletter Glue
After activating the Newsletter Glue plugin, you’ll be taken to our onboarding wizard.
Enter your license key in Step 1.
In Step 2:
- Select Moosend from the Email service provider options
- Paste your API Key
- Click on Connect button
- Once successfully connected, you’ll be able to select your email defaults, complete your onboarding and begin using Newsletter Glue to build and publish newsletters.
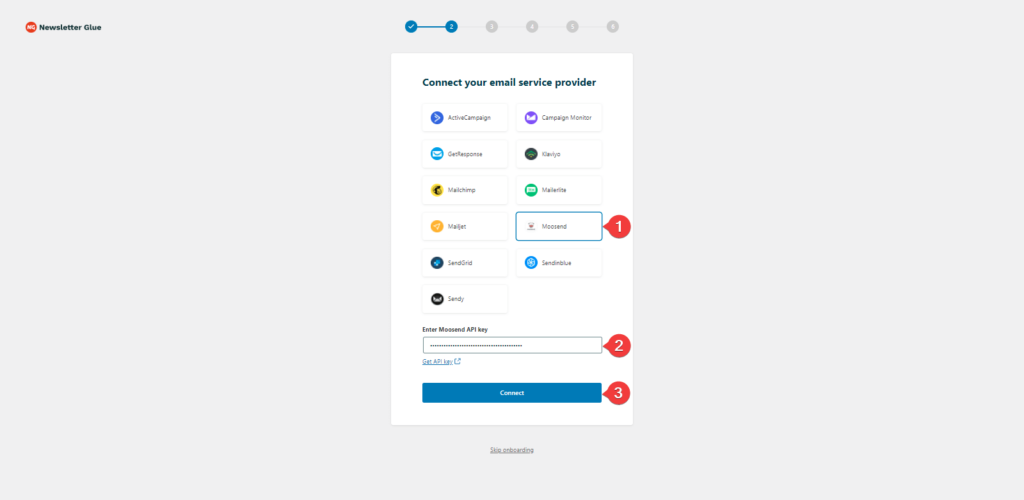
Integrate from Settings -> Connections
Step 1: Get your API key details
- Go to Moosend Dashboard, click on Profile icon -> Settings
- On the Settings page, click API Key menu
- Copy the API Key
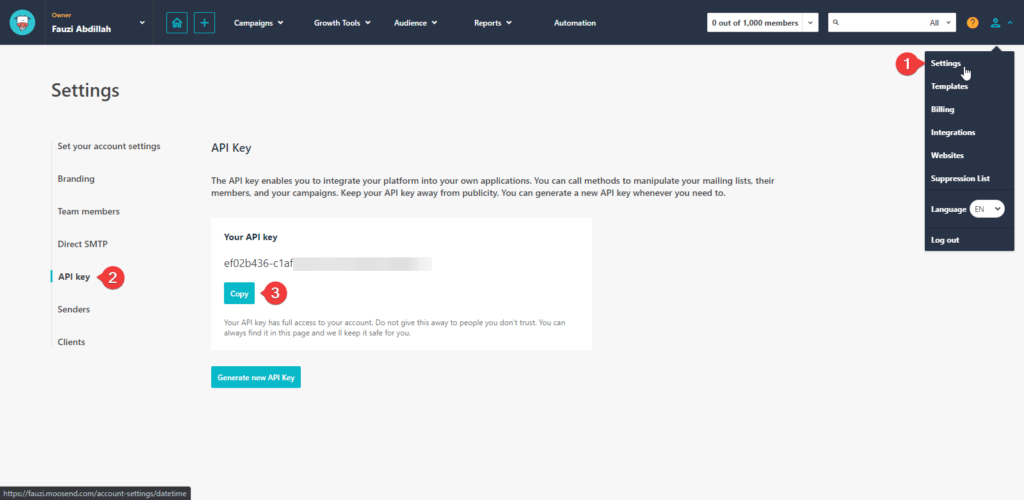
Step 2: Connect Moosend to Newsletter Glue
- On your WP Dashboard, go to the Newsletter Glue Settings page
- On the Connections tab, set as follows:
- Select Moosend from the Email service provider dropdown
- Paste your API Key
- Click on Connect button
- Once successfully connected, you’ll be able to use Newsletter Glue to build and publish newsletters.
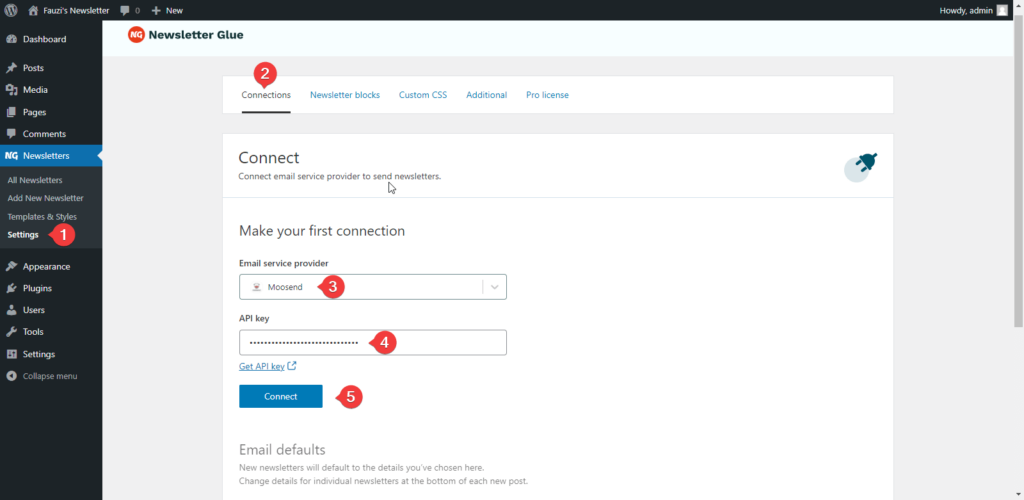
How Newsletter Glue sends to Moosend
Since Newsletter Glue 4.3, your email’s HTML is uploaded to newsletterglue.com, and Moosend fetches it from there. This means sending works even if your host’s firewall stops Moosend from reaching your site, as happens on Pressable.
- The hosted copy is deleted once the campaign has been created or sent.
- If the upload fails, Newsletter Glue uses a temporary file on your own site instead. It’s deleted after 24 hours.
- If Moosend rejects a campaign, you now see Moosend’s own error message instead of “Sent” or “Saved as draft”.
- Developers can turn off hosting on newsletterglue.com with the
newsletterglue_use_html_hostfilter.