Automations will not fire if there is no new content for the Latest Posts block at the time of firing or if the Latest Posts block is not being used.
To bypass this, please add this snippet of code to your site:
add_filter( 'ngl_scheduler_should_check_posts', '__return_false');Pro tip: If you have multiple Latest Posts blocks in your automation campaign where one of the blocks has eligible content, and others do not, your newsletter will still fire. The Latest Posts blocks that are empty will collapse and not show any content.
Cron jobs
Automations will not fire if the WordPress cron is not triggered. By default, the WordPress cron requires site traffic to be triggered. If that doesn’t happen, your automation could fail to send or fail to send on time. The best way to tackle this is to set up a server-level cron to run every minute or every 5 minutes so that your site does not rely on traffic to run your site’s cron.
Option 1: Server cron method (more advanced)
1) To turn off WP-Cron from running automatically on every page load, add the following line to your wp-config.php file. Place it just before the line that says:
define( 'DISABLE_WP_CRON', true );

<code>/* That's all, stop editing! Happy publishing. */</code>2) Next, we’ll need to set up a server-level cron. This particular step varies based on your hosting configuration. Setting a cron every minute is best. Replace “domain.com” with your domain.
wget -q -O - "https://domain.com/wp-cron.php?doing_wp_cron=1" >/dev/null 2>&1Option 2: Easy Cron method (easier)
If setting the cron at the server level is not an option for you, consider using a third-party service like EasyCron to trigger the cron via a URL.
1) To turn off WP-Cron from running automatically on every page load, add the following line to your wp-config.php file. Place it just before the line that says:
define( 'DISABLE_WP_CRON', true );

<code>/* That's all, stop editing! Happy publishing. */</code>
2) Open your Easy Cron cron job dashboard, click on “+ Cron Job” button.
3) In the “URL to call” field, enterhttps://www.example.com/wp-cron.php
(replace www.example.com with your WordPress site’s URL).
Select an appropriate execution frequency. We recommend running the cron job every minute.
Refer to the screenshot below for guidance:
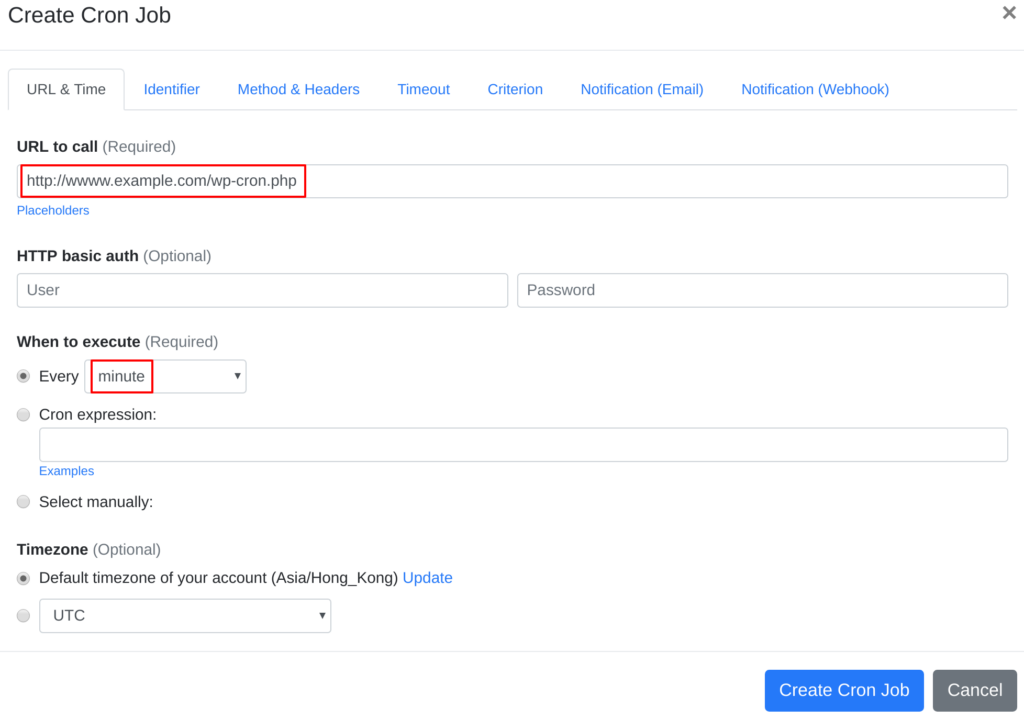
4) Click the “Create Cron Job” button — and you’re done. EasyCron will now trigger your WordPress cron script automatically based on the schedule you selected.
5) If you haven’t registered an EasyCron account yet, click the “Add a password” link at the top of the page to set up your email and password.