
Newsletter Glue can send your newsletters for you. Build them in WordPress and send them from the same place, with no separate email service like Mailchimp to sign up for. Your lists, segments and subscribers are managed from your WordPress admin.
In the plugin, this option is called Newsletter Glue ESP. ESP is short for email service provider, the service that delivers your emails. You’ll see that name on the buttons and menus below.
There is no API key to copy. Your Newsletter Glue license connects your site, and each site gets its own sending identity.
Your newsletters are sent from your own domain. Subscribers see your name and your address, for example [email protected], never a Newsletter Glue address. The DNS records you add during setup authenticate your domain, so inbox providers recognise the mail as coming from you, and the reputation you build stays with your domain.
Before you start
- A Newsletter Glue license, with the plugin installed and activated on your WordPress site.
- Access to the DNS settings for the domain you will send from, at your domain registrar or in Cloudflare.
- The sending approval form filled out. We review every new sender before sending is switched on.
Connect during onboarding
After activating the plugin you are taken to the onboarding wizard. Enter your license key to activate your license, then choose how your newsletters are sent.
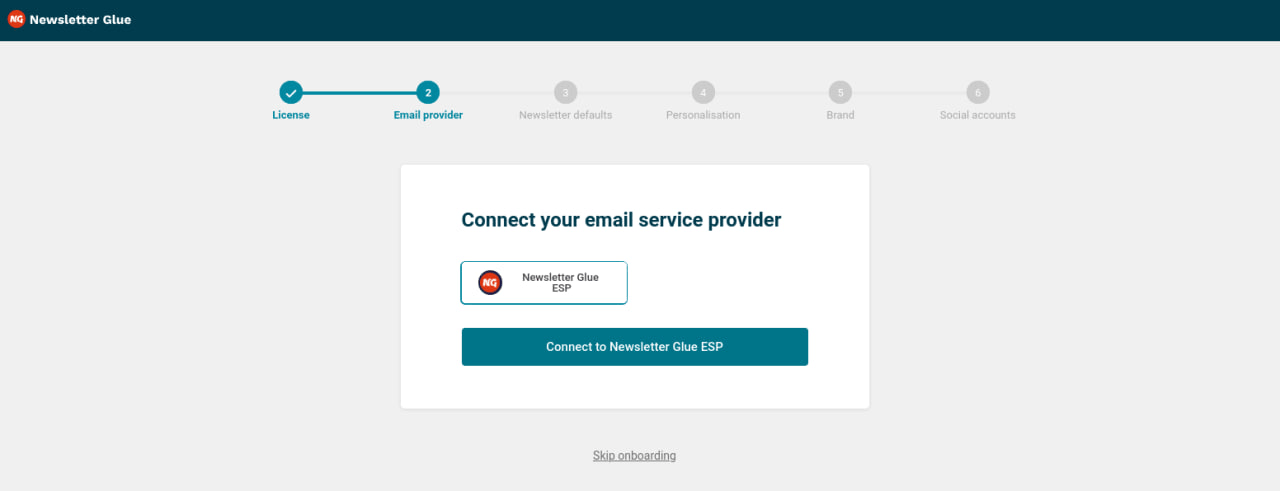
Step 1: Choose Newsletter Glue as your sending service
- Select Newsletter Glue ESP from the list of sending options.
- Click Connect to Newsletter Glue ESP.
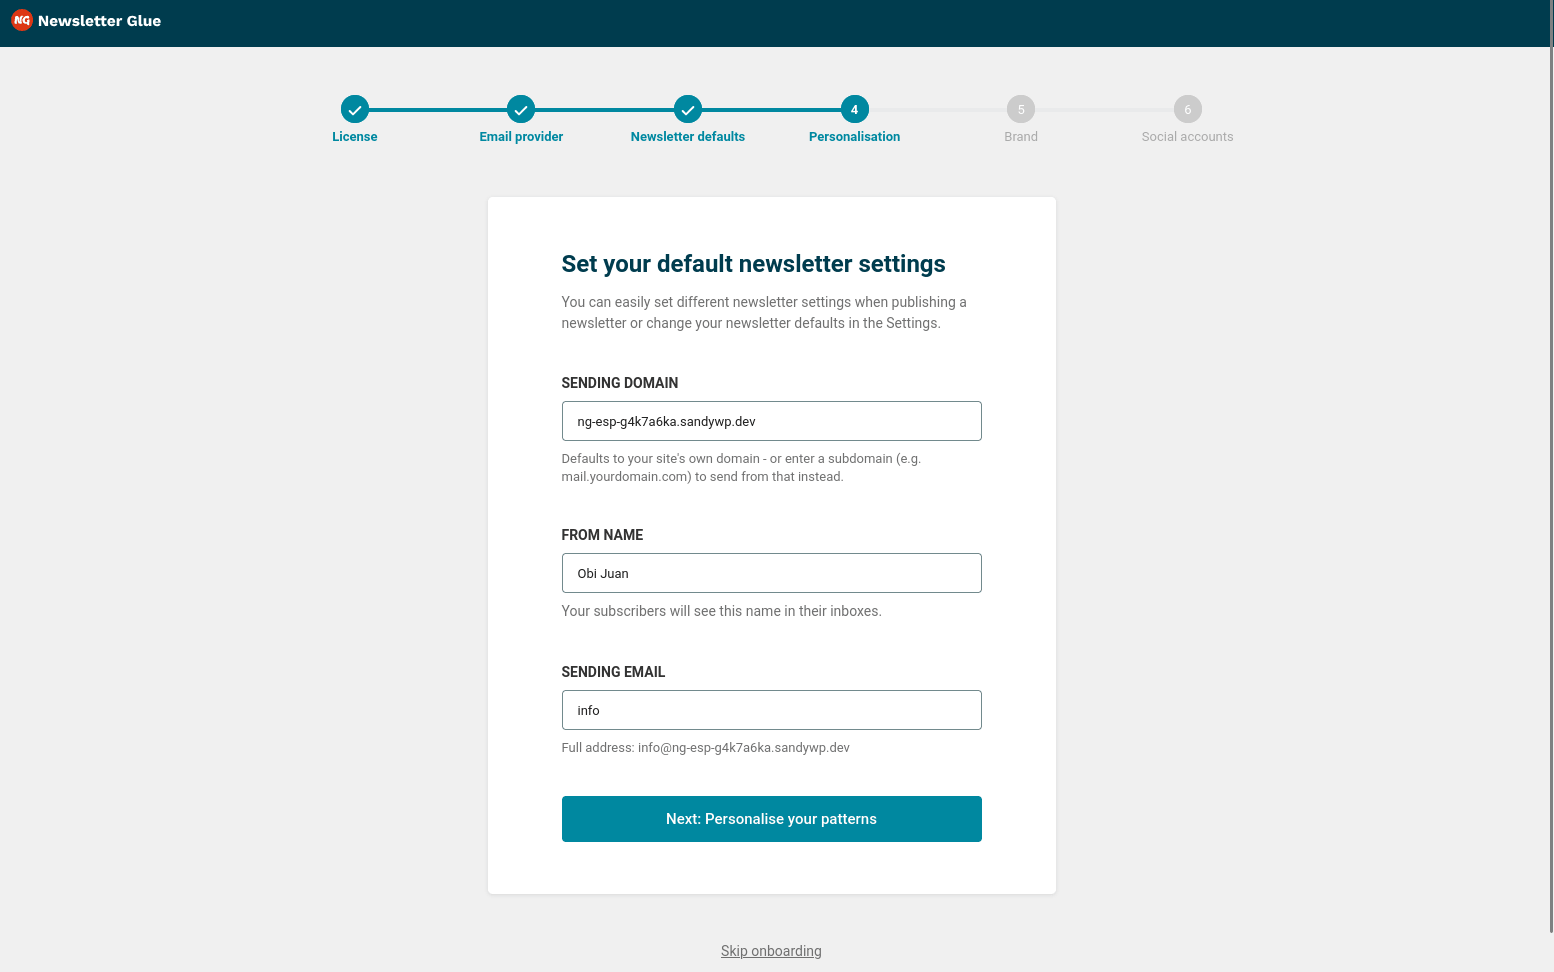
Step 2: Set your sending identity
- Fill in your Sending domain, From name and Sending email. Use your own domain and an address on it, for example [email protected]. This is the address your subscribers will see.
- Click Next: Personalise your patterns.
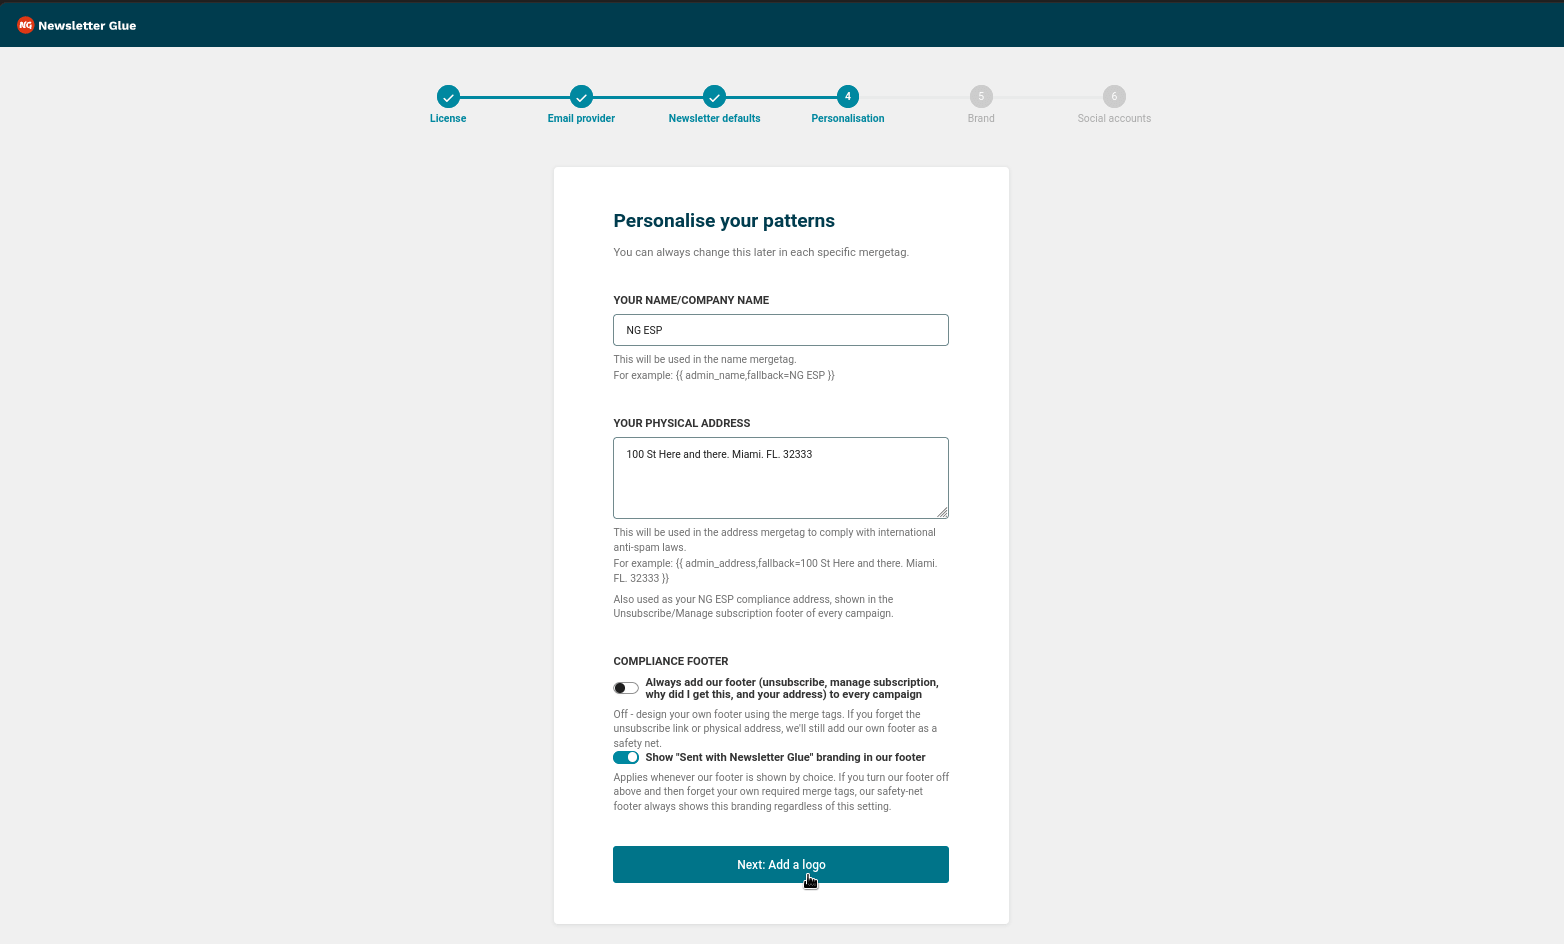
Step 3: Add your footer details
Fill in Your name/company name, Your physical address and the Compliance footer settings, then click Next: Add a logo. A physical address is required in the footer of every newsletter you send.
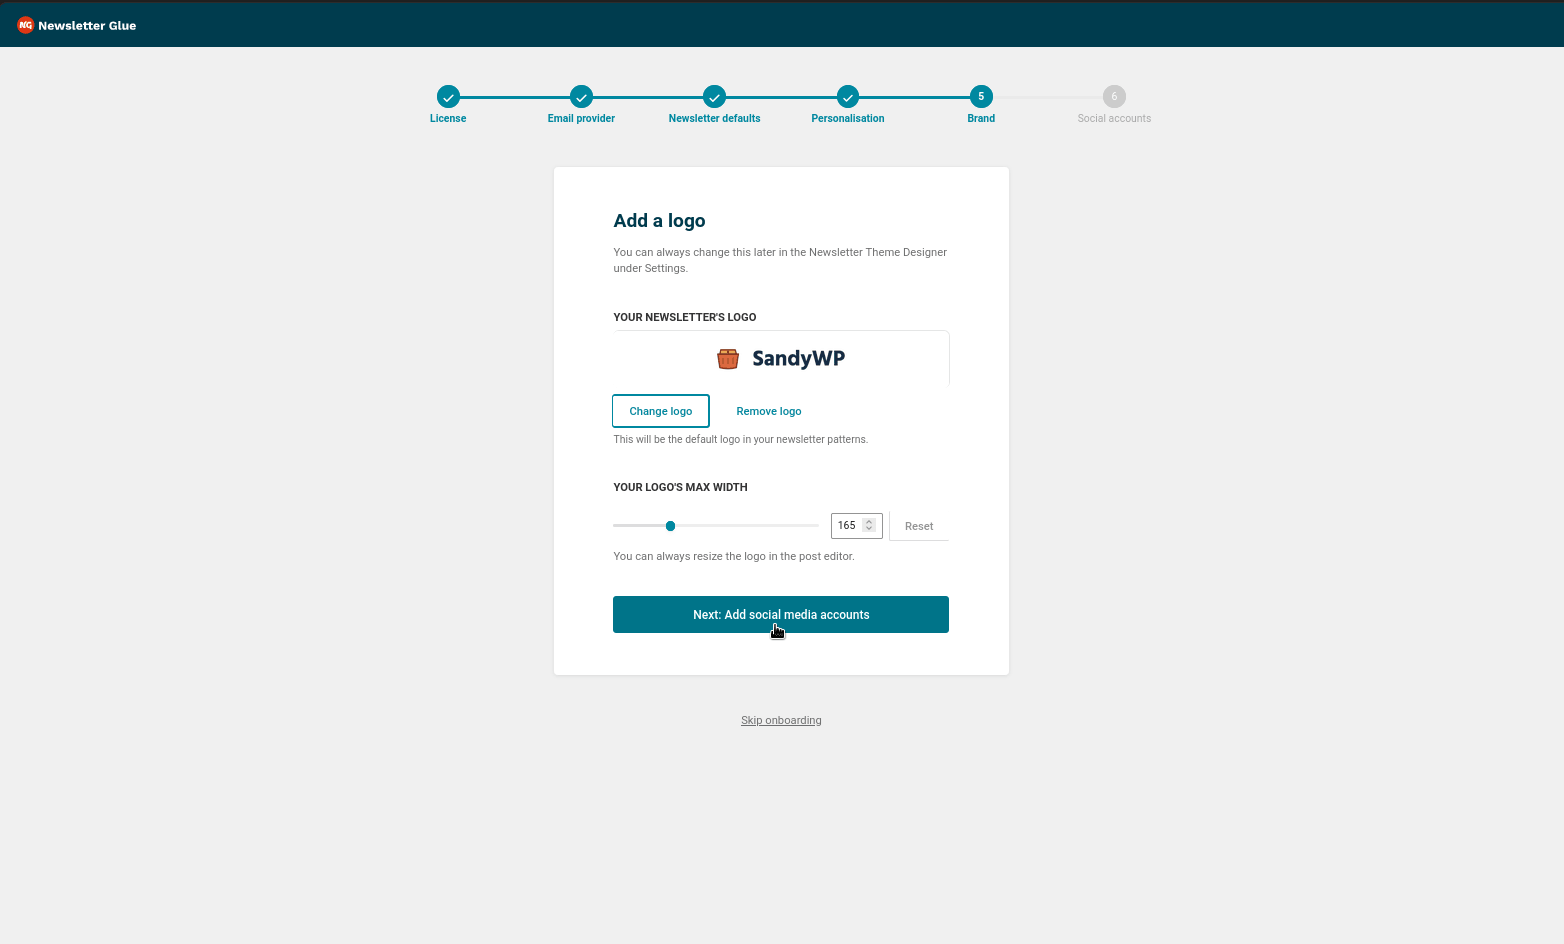
Step 4: Add your logo and social accounts
- Upload your logo, then click Next: Add social media accounts.
- Add any social media accounts you want in your newsletters (optional).
- Click Complete onboarding and head to demo post.
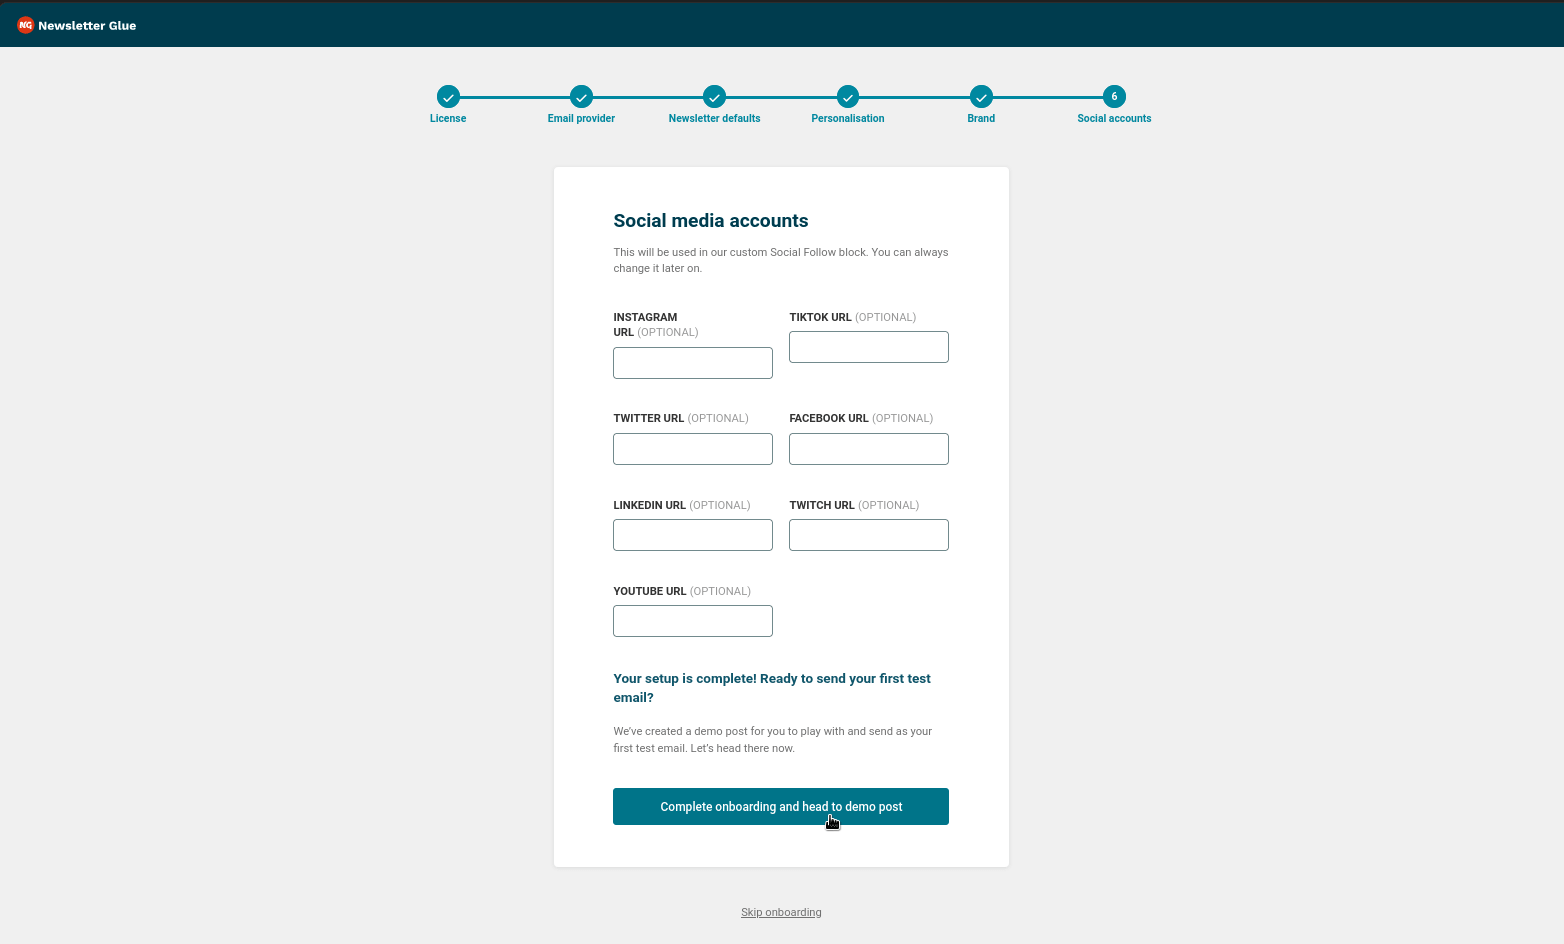
Step 5: Check the connection
The wizard opens a first demo campaign. Go back to your WordPress admin, then to Newsletters > Settings > Connections. Newsletter Glue ESP shows as Connected. Click it to expand the details.
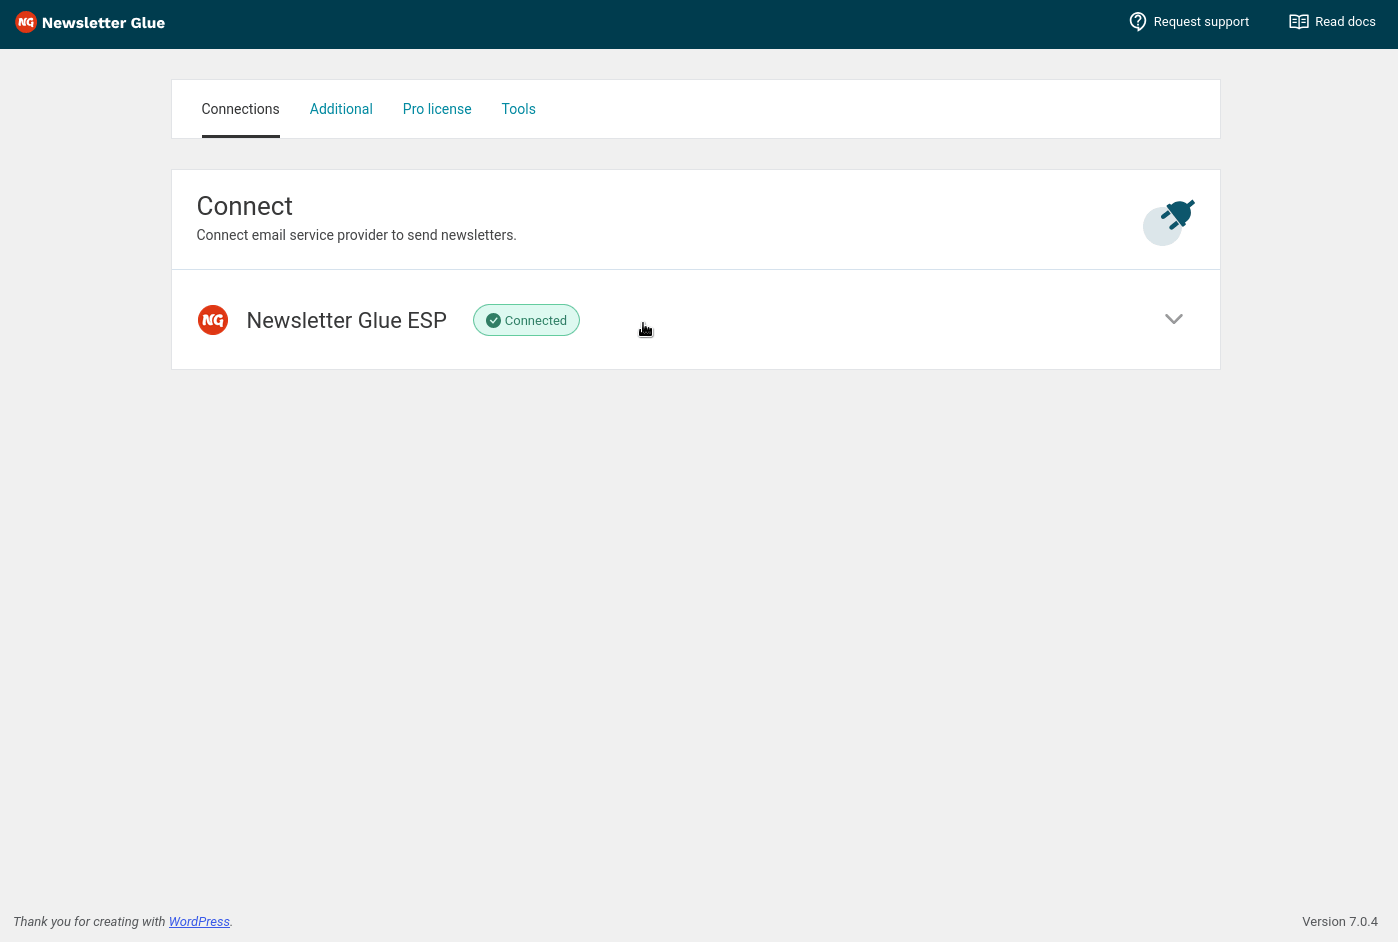
Next, verify your domain (below).
Connect from Settings
Step 1: Choose Newsletter Glue as your sending service
- In your WordPress admin, go to Newsletters > Settings.
- Select Newsletter Glue ESP from the integration dropdown.
- Click Connect to Newsletter Glue ESP.
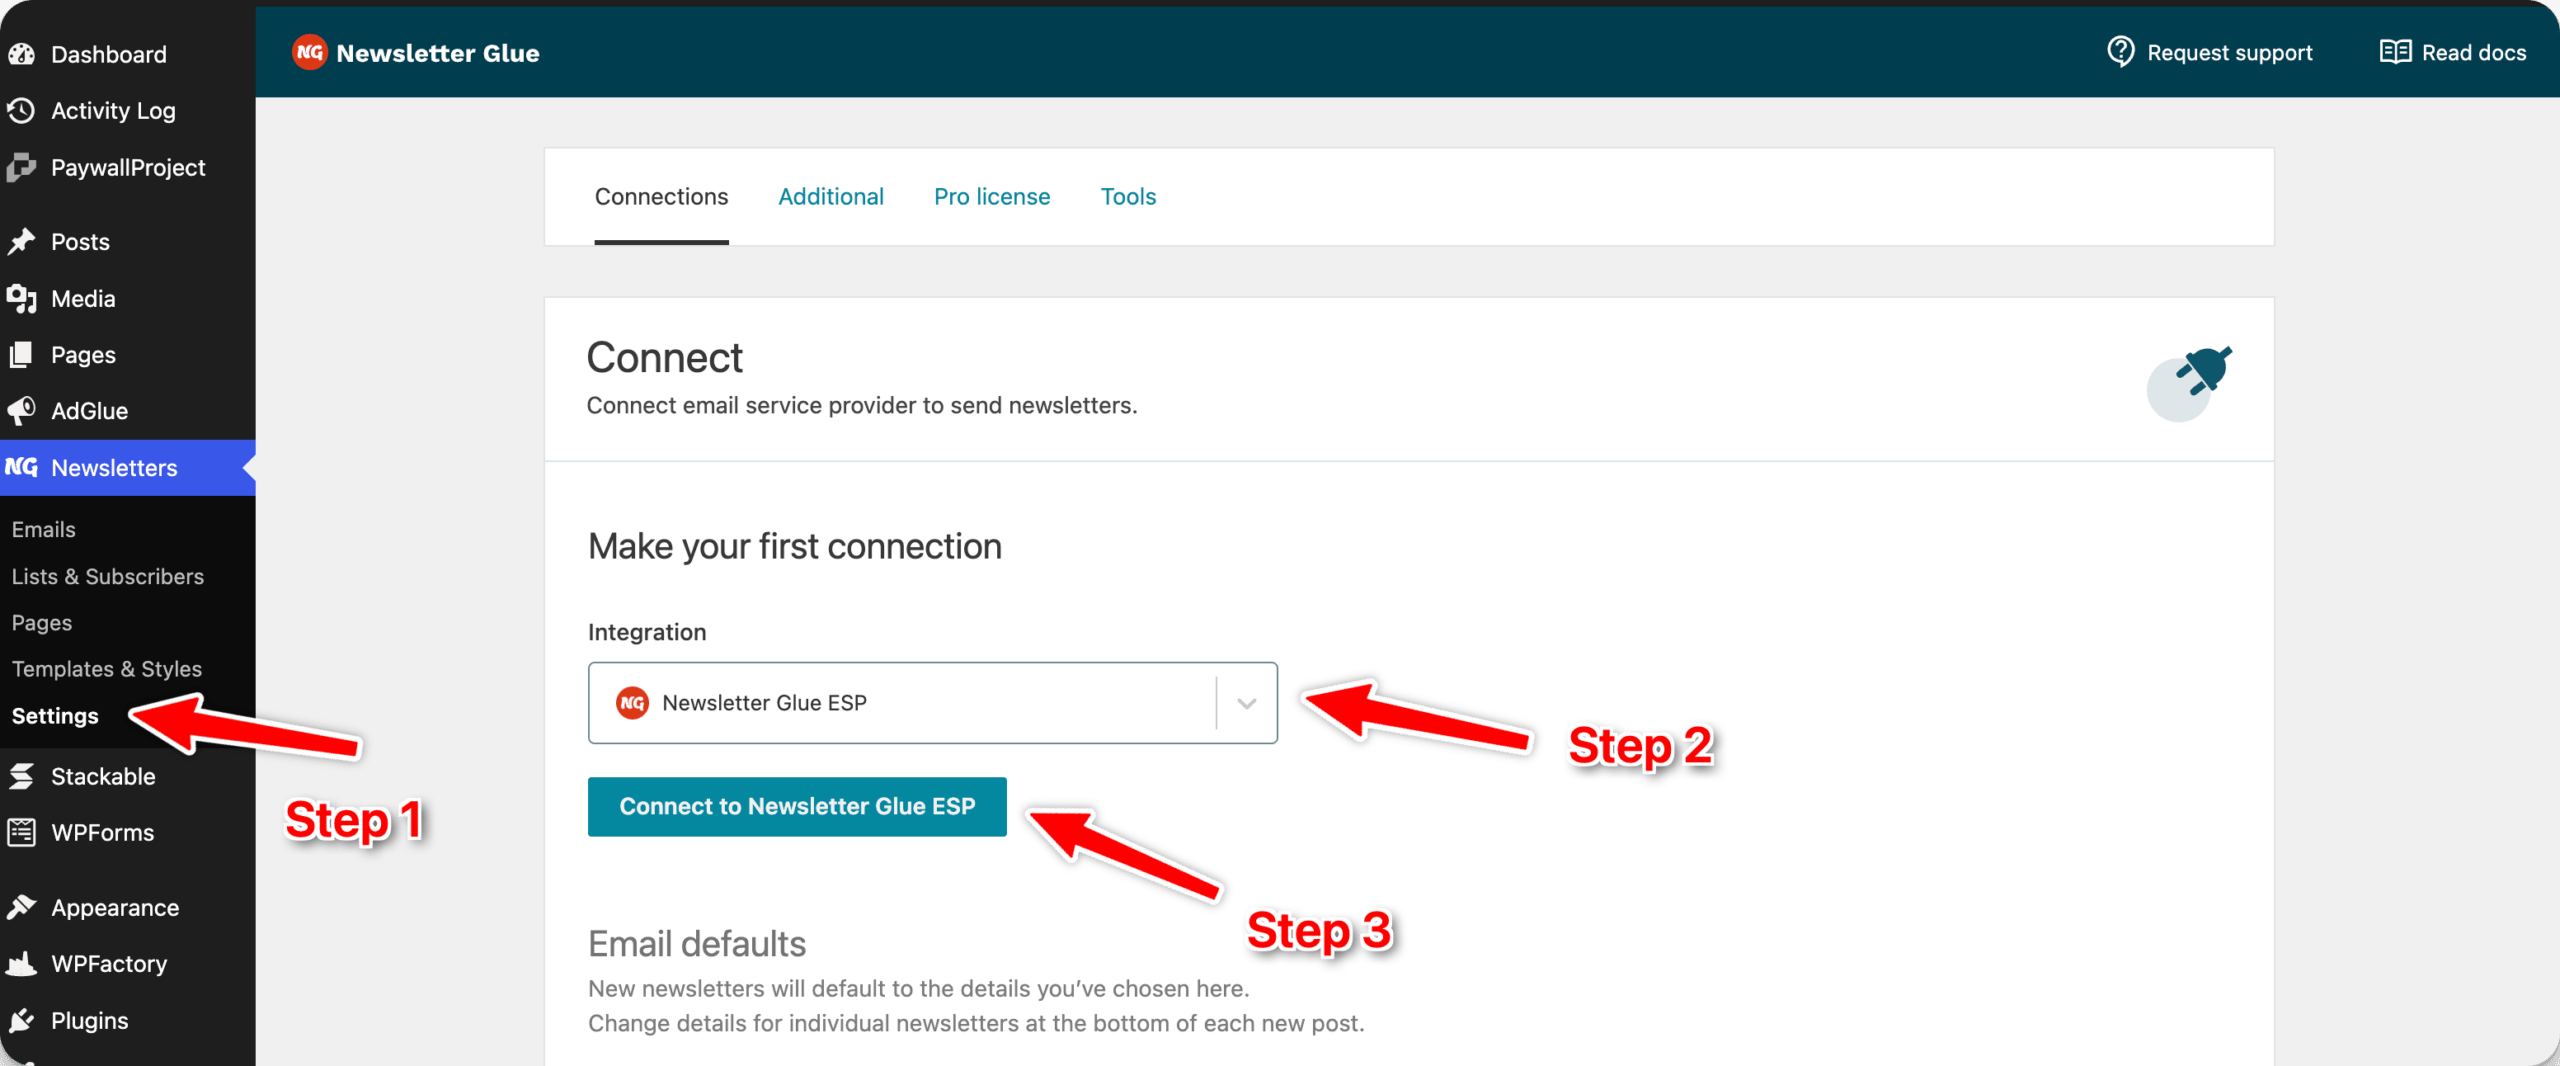
Step 2: Enter your sending details
- Fill in your Sending domain, Sending email, From name, Opt-in setting and Physical mailing address. The sending domain and email should be your own, for example yourpaper.com and [email protected].
- Click Connect to Newsletter Glue ESP.
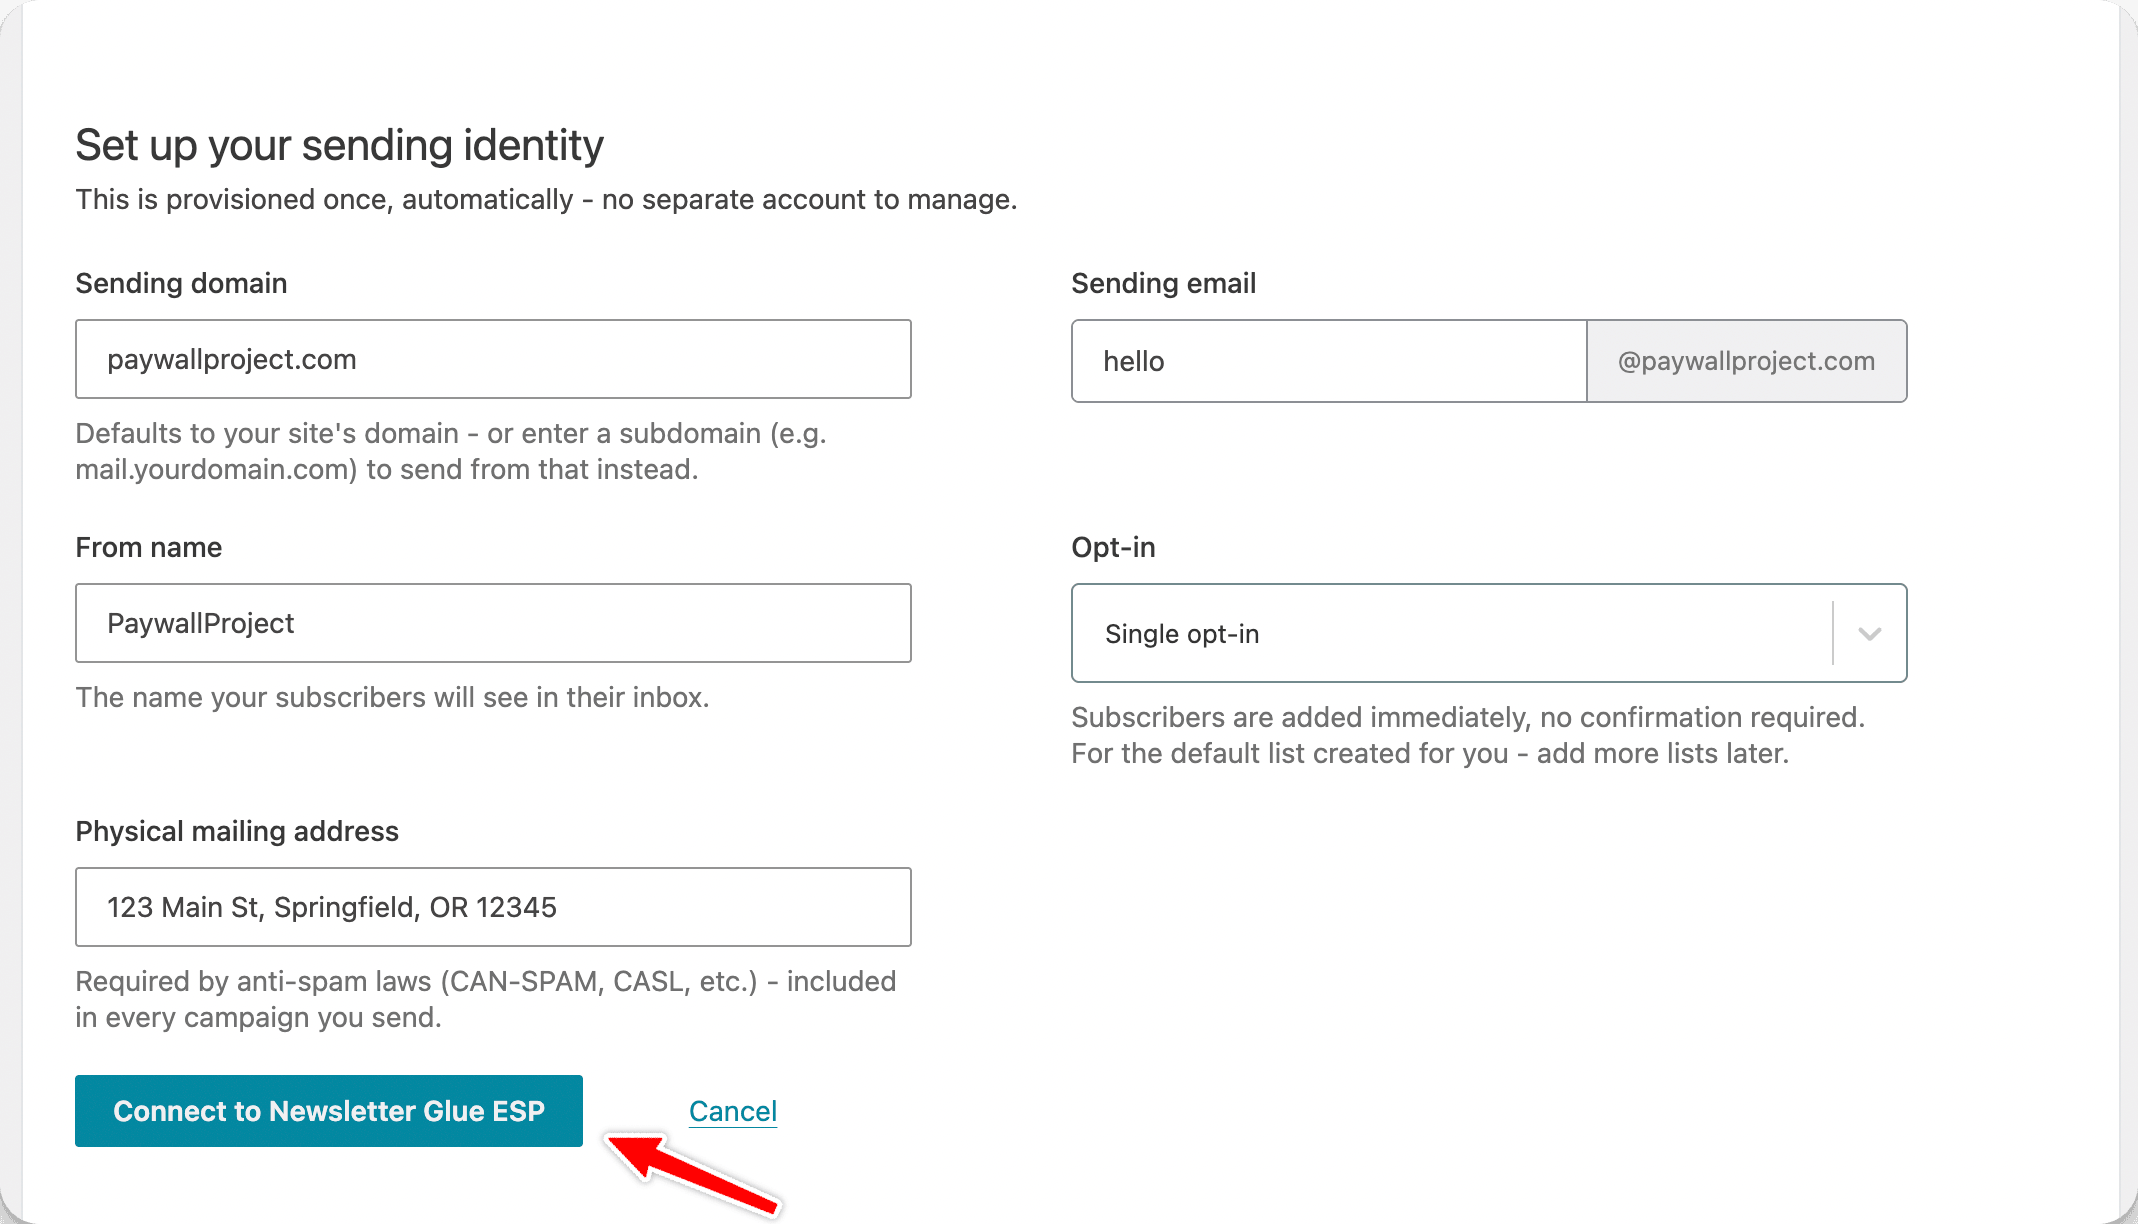
Next, verify your domain.
Verify your sending domain
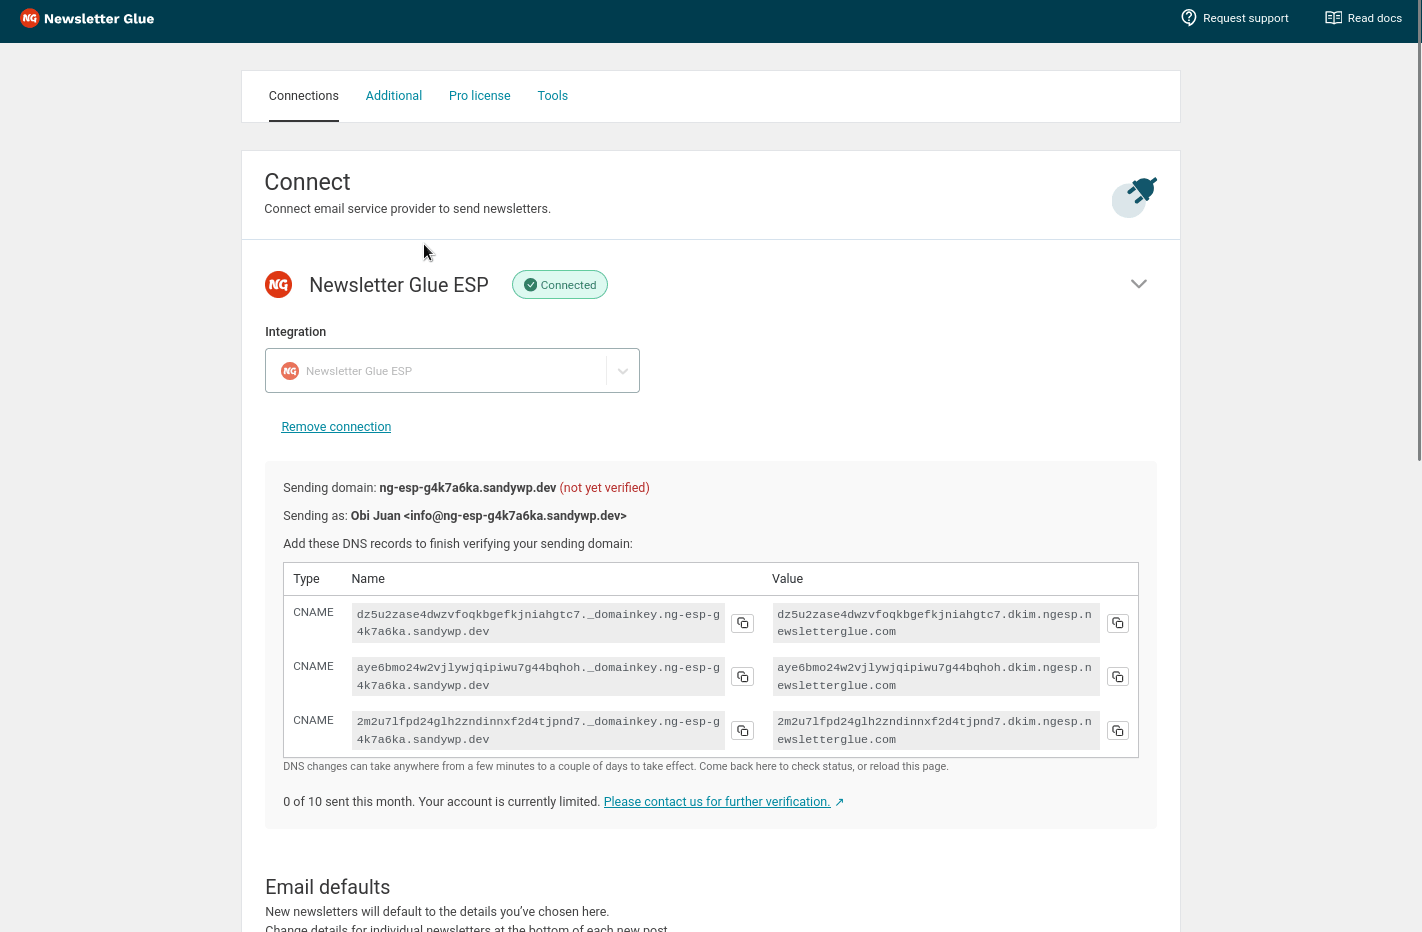
Whichever way you connected, your domain needs to be verified before you can send. Verification proves you own the domain and lets your newsletters go out as your domain, signed and authenticated so they reach the inbox. Until then, the connection details show that the domain is not verified.
- Go to Newsletters > Settings > Connections and expand Newsletter Glue ESP.
- Copy the DNS records shown on screen.
- Add them to your domain’s DNS settings, at your domain registrar or in your Cloudflare account.
- Wait for verification. It happens automatically, but DNS changes can take up to 72 hours to spread.
Get sending switched on
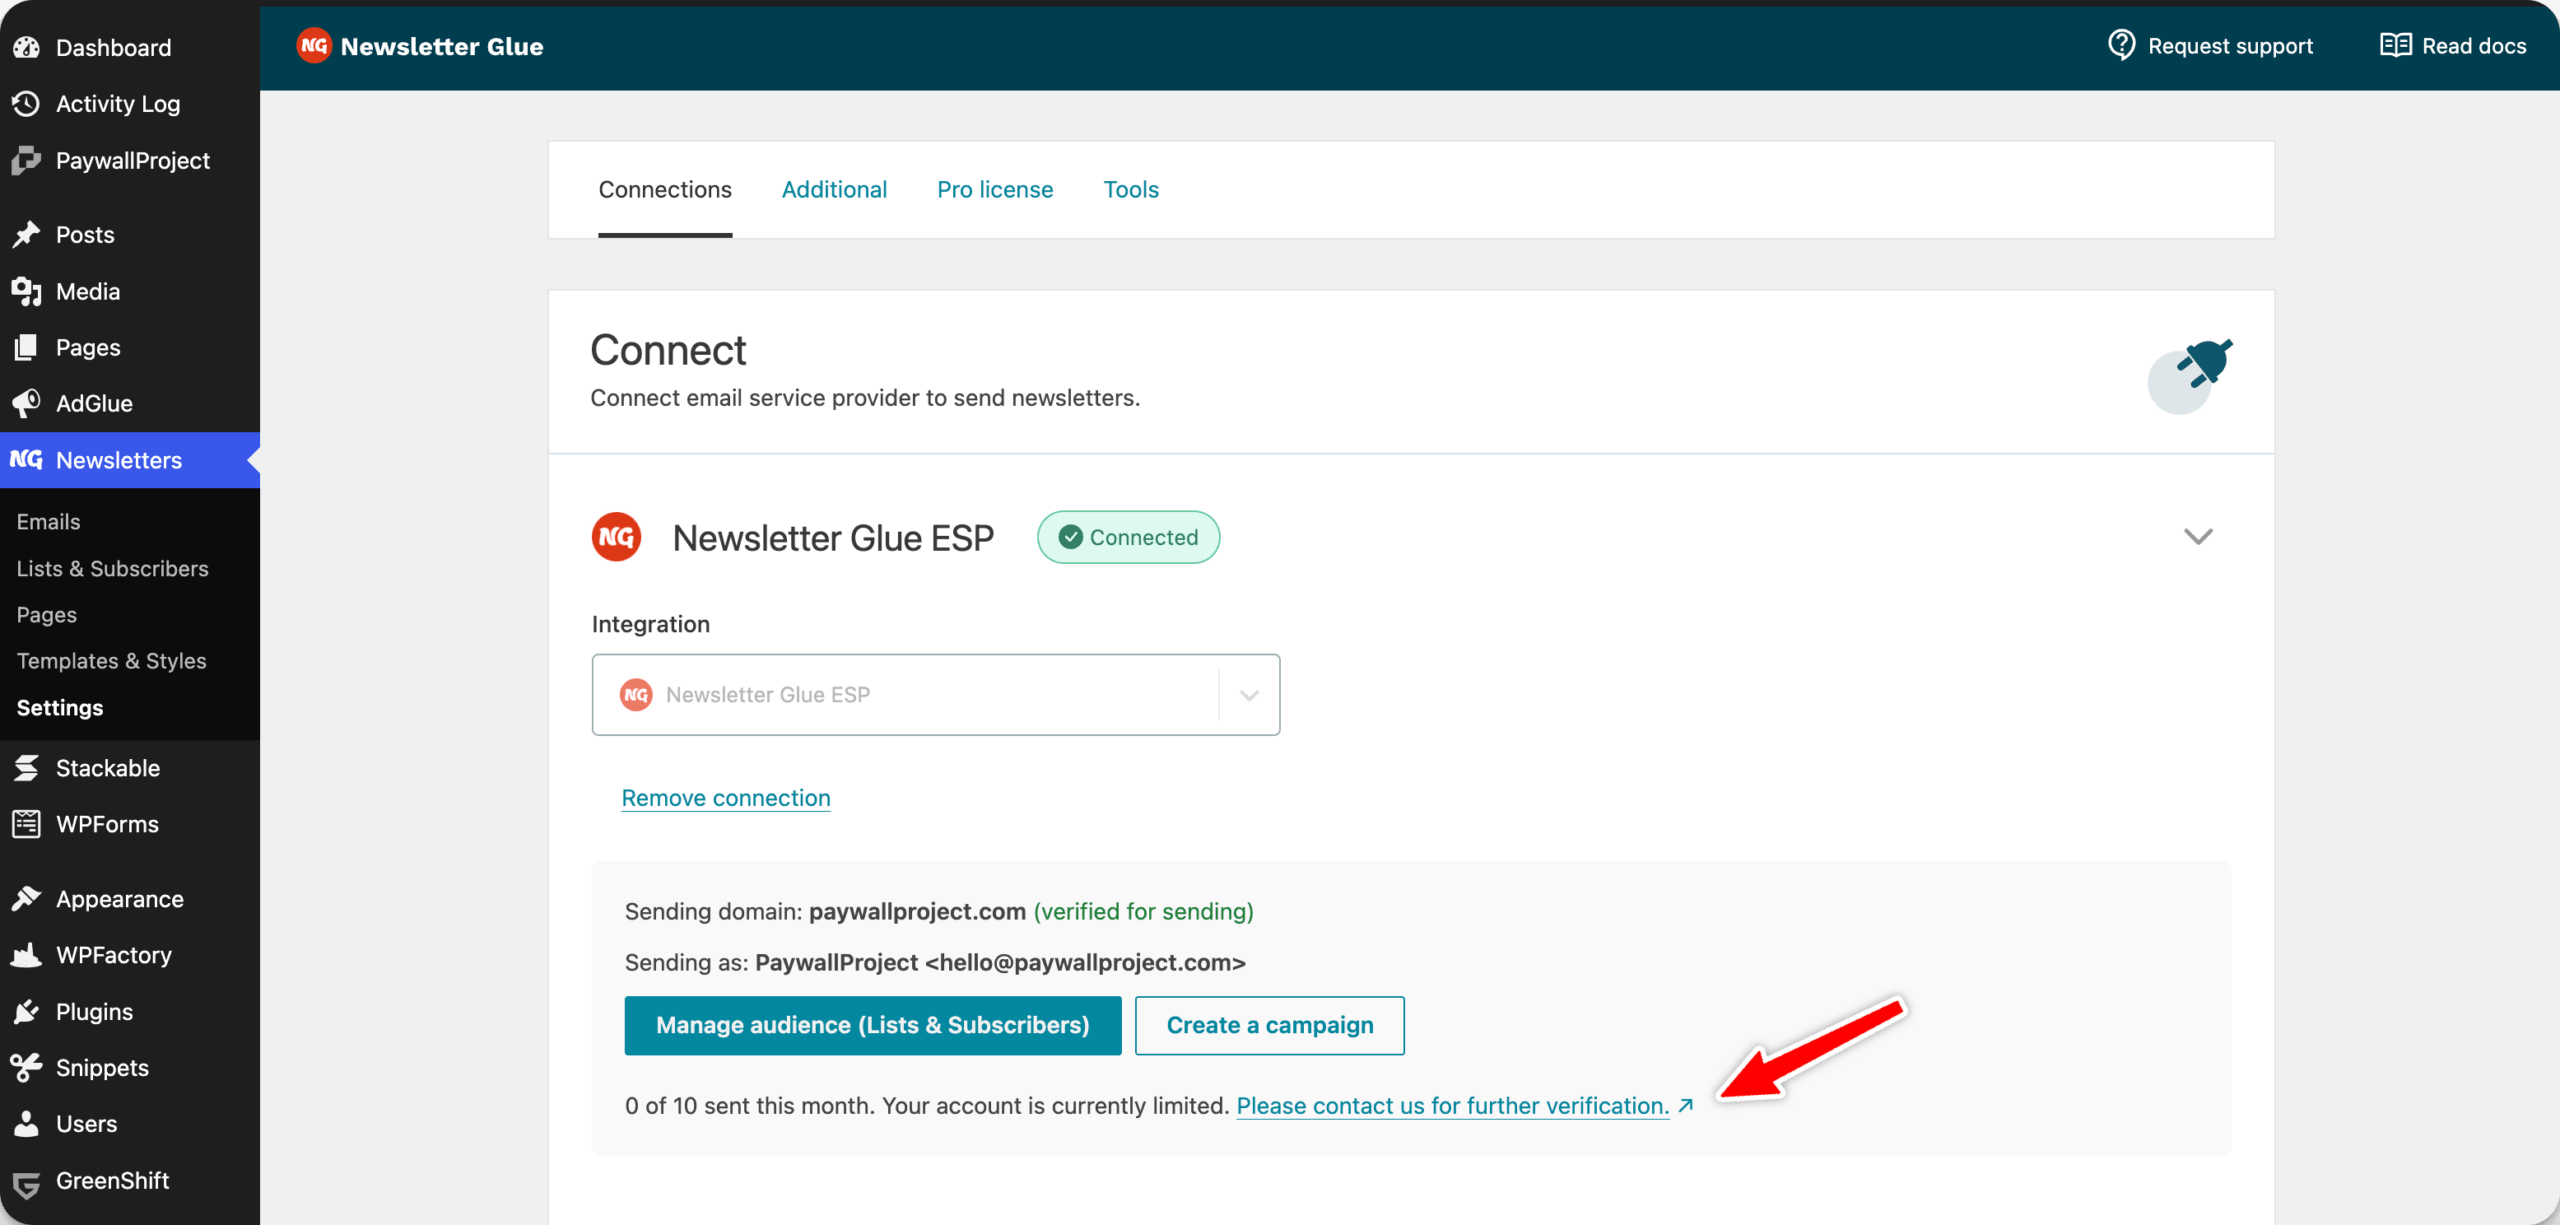
New accounts start with sending restricted. Once your domain is verified, contact our support team to lift the restriction. We vet every sender by hand to protect our sending reputation, which is what keeps your newsletters landing in inboxes.
Choosing who receives a campaign
- Send a campaign to one or more lists, or to one or more segments, but not a mix of both.
- If you select lists and segments together, the campaign is sent to the segments only.
- If you leave the list empty, the campaign goes to all of your lists.
Good to know
- Merge tags you have set up as custom fields can be used in your newsletters.
- You can collect new subscribers with the Newsletter Glue sign-up form block, connected to one of your lists.
- Need help? Contact us and a real person on our team will reply.