
You can move your newsletter from Mailchimp, AWeber or another email service to Newsletter Glue ESP without missing a send. This guide covers what to prepare, how to switch, and what to check afterwards.
Note: Newsletter Glue connects to one email service at a time. When you connect Newsletter Glue ESP, your current connection (for example Mailchimp) is removed. Plan the switch for a quiet day between newsletters.
Before you switch
- Export your subscribers from your current service as a CSV file. Export only subscribed contacts, not unsubscribed, bounced or cleaned ones. Keep the name columns and any columns you want to bring with you, such as which newsletters someone gets or whether they pay.
- List what uses your current service: automations, pages with a Subscriber form block, and any newsletters you have scheduled.
- Check you can edit your domain’s DNS settings, at your domain registrar or in Cloudflare. You’ll add a few records to verify your sending domain.
- Fill out the sending approval form. We review every new sender before sending is switched on. See Send newsletters through Newsletter Glue.
- Leave yourself time. DNS changes can take from a few minutes to a couple of days. Switch at least two days before your next newsletter.
Switch to Newsletter Glue ESP
- Go to Newsletters > Settings > Connections. Click Remove connection to disconnect your current service.
- Choose Newsletter Glue ESP and click Connect.
- Enter your sending domain, from email and from name, then add the DNS records shown to verify your domain. The full steps are in Send newsletters through Newsletter Glue.
- Add your Physical mailing address on the same screen. Every email must include it.
- Import your subscribers from the CSV file you exported. See Import subscribers from a CSV file.
- Set up your unsubscribe pages and email footer. See Subscriber pages and the email footer.
- Once your domain shows as verified, contact us to switch on sending.
- Send a test email to yourself and check it in your inbox.
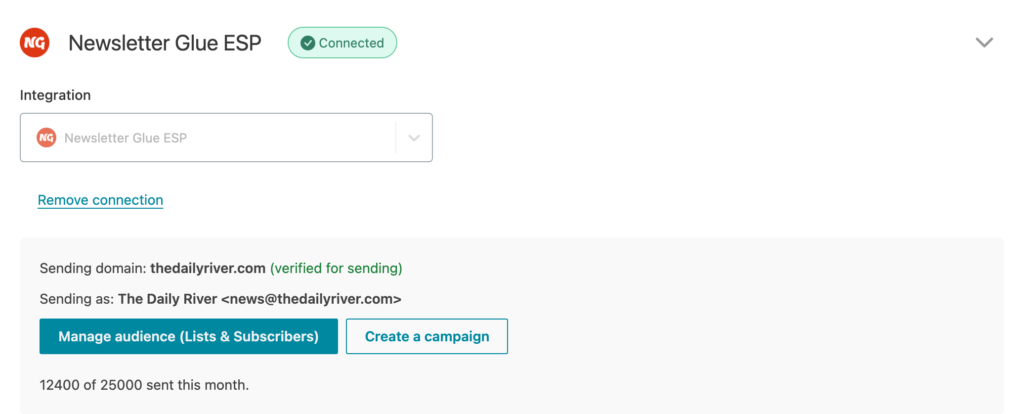
Once you’re connected, Newsletters > Settings > Connections shows your sending domain, the address you send from, and how many emails you’ve sent this month.
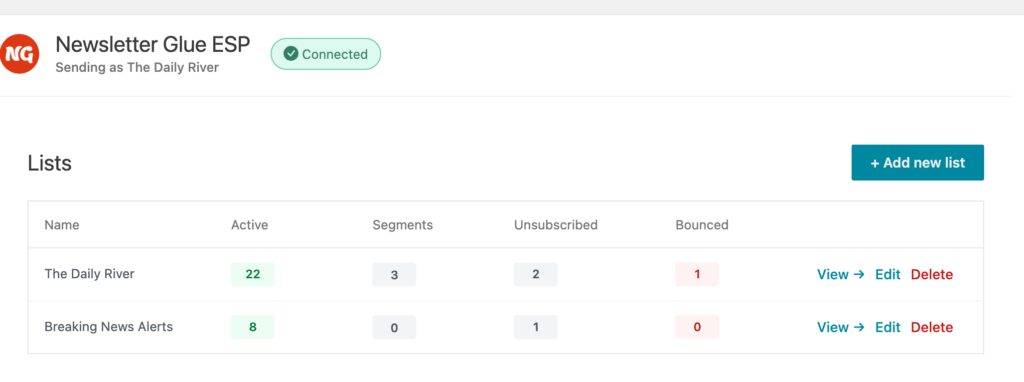
Your imported subscribers appear under Newsletters > Lists & Subscribers.
After you switch
Settings that pointed at lists in your old service don’t carry over. Check each of these:
- Automations: open each automation and choose your Newsletter Glue ESP list or segment. See Creating automated newsletters.
- Subscriber forms: edit each page that has a Subscriber form block and choose your Newsletter Glue ESP list. New sign-ups go to the list the form names, so do this straight away.
- Scheduled newsletters: open each one and check who it goes to.
- Paid-only and optional newsletters: if you offer more than one newsletter, set them up with Newsletter options.
Keep your old account open until your first newsletter has gone out through Newsletter Glue ESP. Anyone who unsubscribes from your old service in the meantime should be removed from your new list too.
If you need to switch back
You can reconnect your old service at any time from Newsletters > Settings > Connections. Newsletter Glue remembers your Newsletter Glue ESP sending domain, so you don’t have to set it up again when you come back.
Good to know
- Your sending domain is locked once it’s set up. To change it later, contact us.
- Newsletter Glue ESP plans include the Newsletter Glue plugin, so you don’t pay for both. See Newsletter Glue ESP plans and sending limits.
- Want help moving? Contact us and we’ll walk you through it.