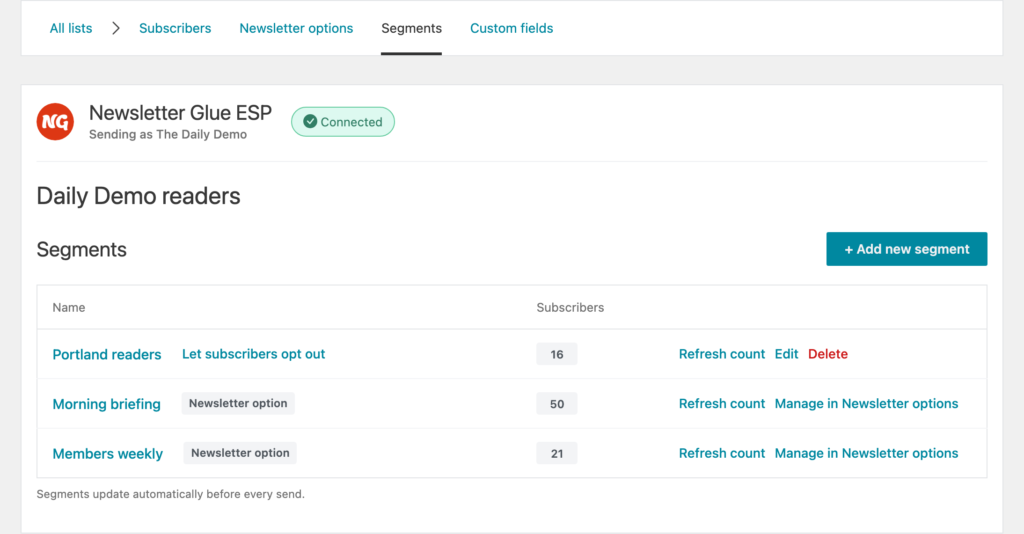
If you send with Newsletter Glue ESP, one list can carry several newsletters. Some can go to everyone, others only to paid subscribers. Subscribers choose which ones they get on your sign-up form and on their Manage Subscription page.
For example: a free daily for everyone, plus a weekly for paying members.
Before you start
- Newsletter Glue 4.3 or later, connected to Newsletter Glue ESP.
- A list under Newsletters > Lists & Subscribers.
- For paid-only newsletters: a custom field that your payment system sets when someone pays, for example Stripe through Zapier or Pabbly.
Open Newsletter options
- Go to Newsletters > Lists & Subscribers.
- Next to your list, click View.
- Click the Newsletter options tab. It walks you through four steps.
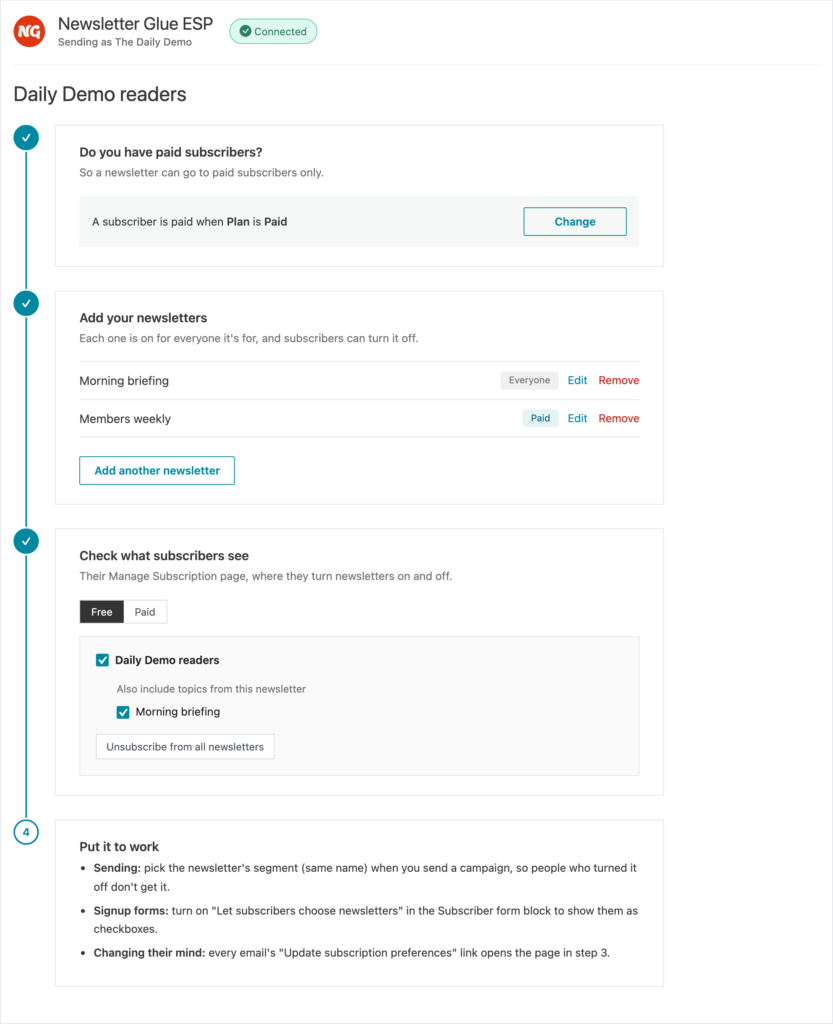
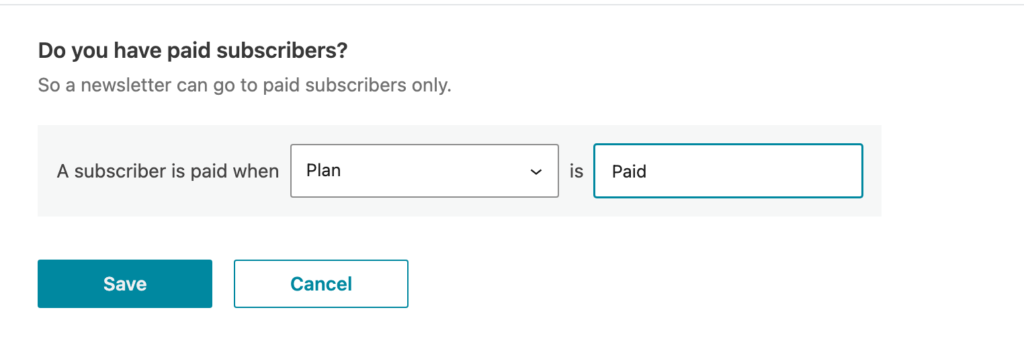
Step 1: Do you have paid subscribers?
Click Yes, I have paid subscribers. If you don’t have any, click No, not yet and go to step 2. You can come back later and click I have paid subscribers.
Then complete the rule A subscriber is paid when [field] is [value]. Choose the field, or + Create a new field, and enter the value your payment system sets, for example paid. Click Change to edit the rule later.
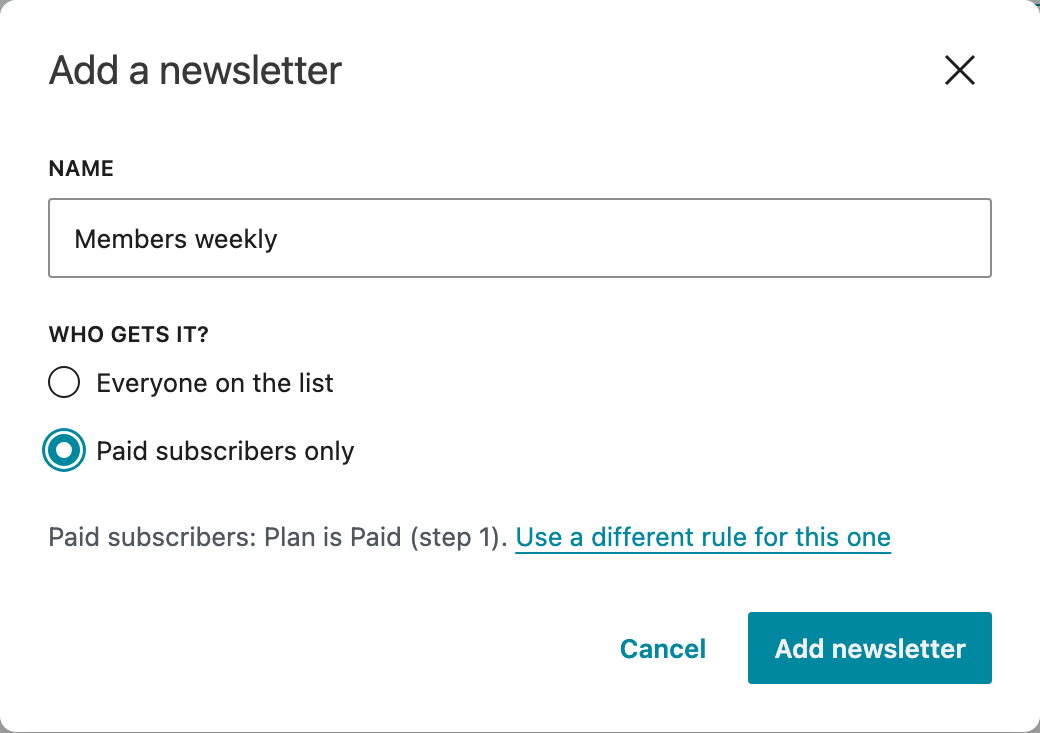
Step 2: Add your newsletters
- Click Add your first newsletter (or Add another newsletter).
- Enter a Name, for example Premium newsletter.
- Under Who gets it?, choose Everyone on the list or Paid subscribers only. A paid-only newsletter uses the rule from step 1. To give one newsletter its own rule, choose Use a different rule for this one.
- Click Add newsletter.
Each newsletter shows a badge, Everyone or Paid. Use Edit or Remove to change it. A new newsletter is on for everyone it’s for, and subscribers can turn it off.
Turn an existing field into a newsletter
Already track a newsletter in a custom field? On the Custom fields tab, click Make it a newsletter next to the field. Then choose who has it on now: Only people with a certain value or Everyone, except people with a certain value. Yes, 1 and true count as on. No, 0 and false count as off.
Step 3: Check what subscribers see
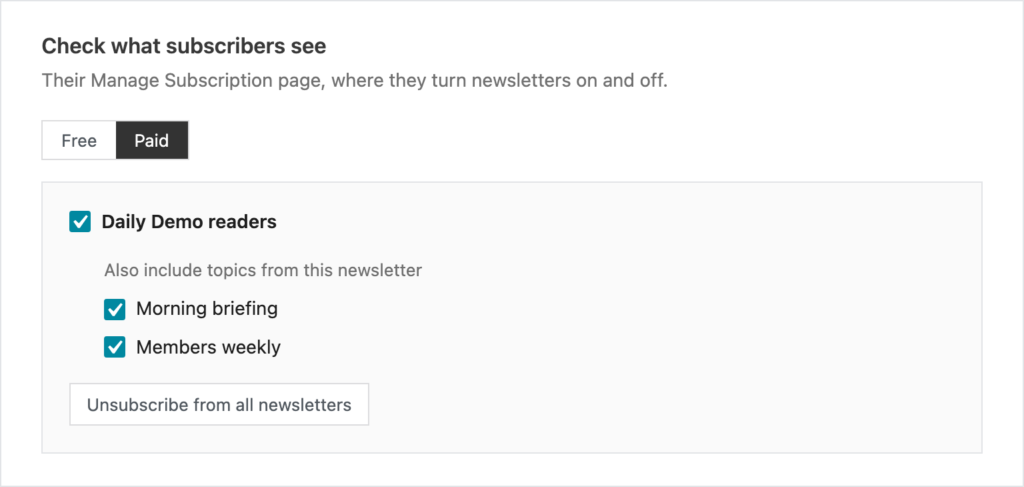
This step previews the Manage Subscription page, where subscribers turn newsletters on and off. Switch between Free and Paid to see both views. Paid-only newsletters are hidden from subscribers who aren’t paid.
Step 4: Put it to work
- Sending: when you send a campaign, pick the newsletter’s segment. It has the same name as the newsletter, so people who turned it off don’t get it.
- Sign-up forms: in the Subscriber form block, turn on Let subscribers choose newsletters to show your newsletters as checkboxes. Only newsletters for everyone appear on public forms. See Subscriber form block.
- Changing their mind: the Update subscription preferences link in every email opens the Manage Subscription page.
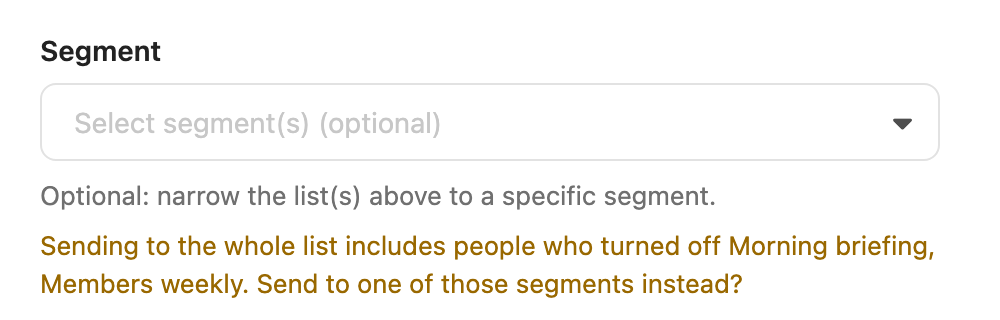
If you pick a whole list in the send panel, Newsletter Glue reminds you that it includes people who turned a newsletter off:
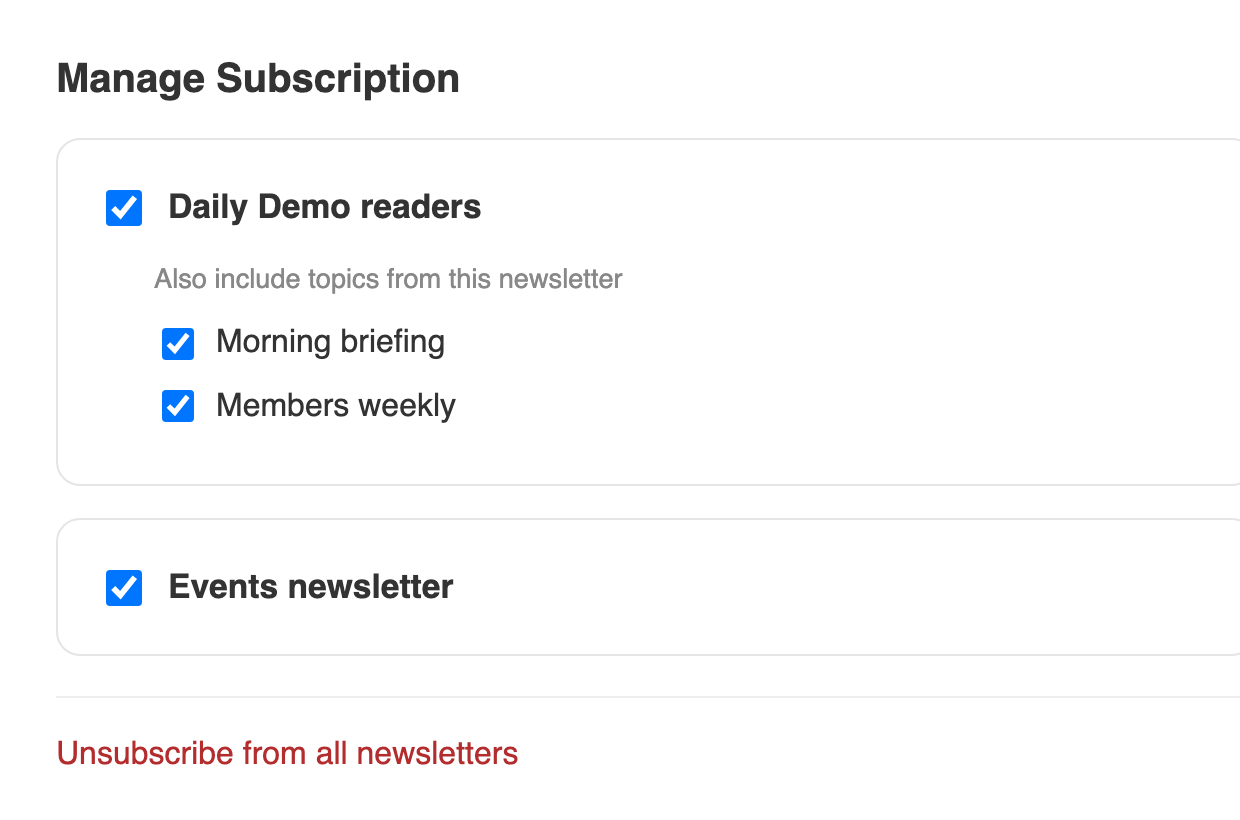
This is what a paid subscriber sees on the Manage Subscription page. A free subscriber doesn’t see the paid-only newsletter.
Good to know
- Each newsletter is a Yes/No custom field on the list, plus a segment with the same name. Segments update automatically before every send.
- Choose your Manage Subscription page under Newsletters > Pages, or click Create these pages for me automatically.
- Importing subscribers? A CSV column named after a newsletter sets it for each subscriber. See Import subscribers from a CSV file.